Connect Openapi to HubSpot
A step by step guide to connect HubSpot to Openapi and full setup
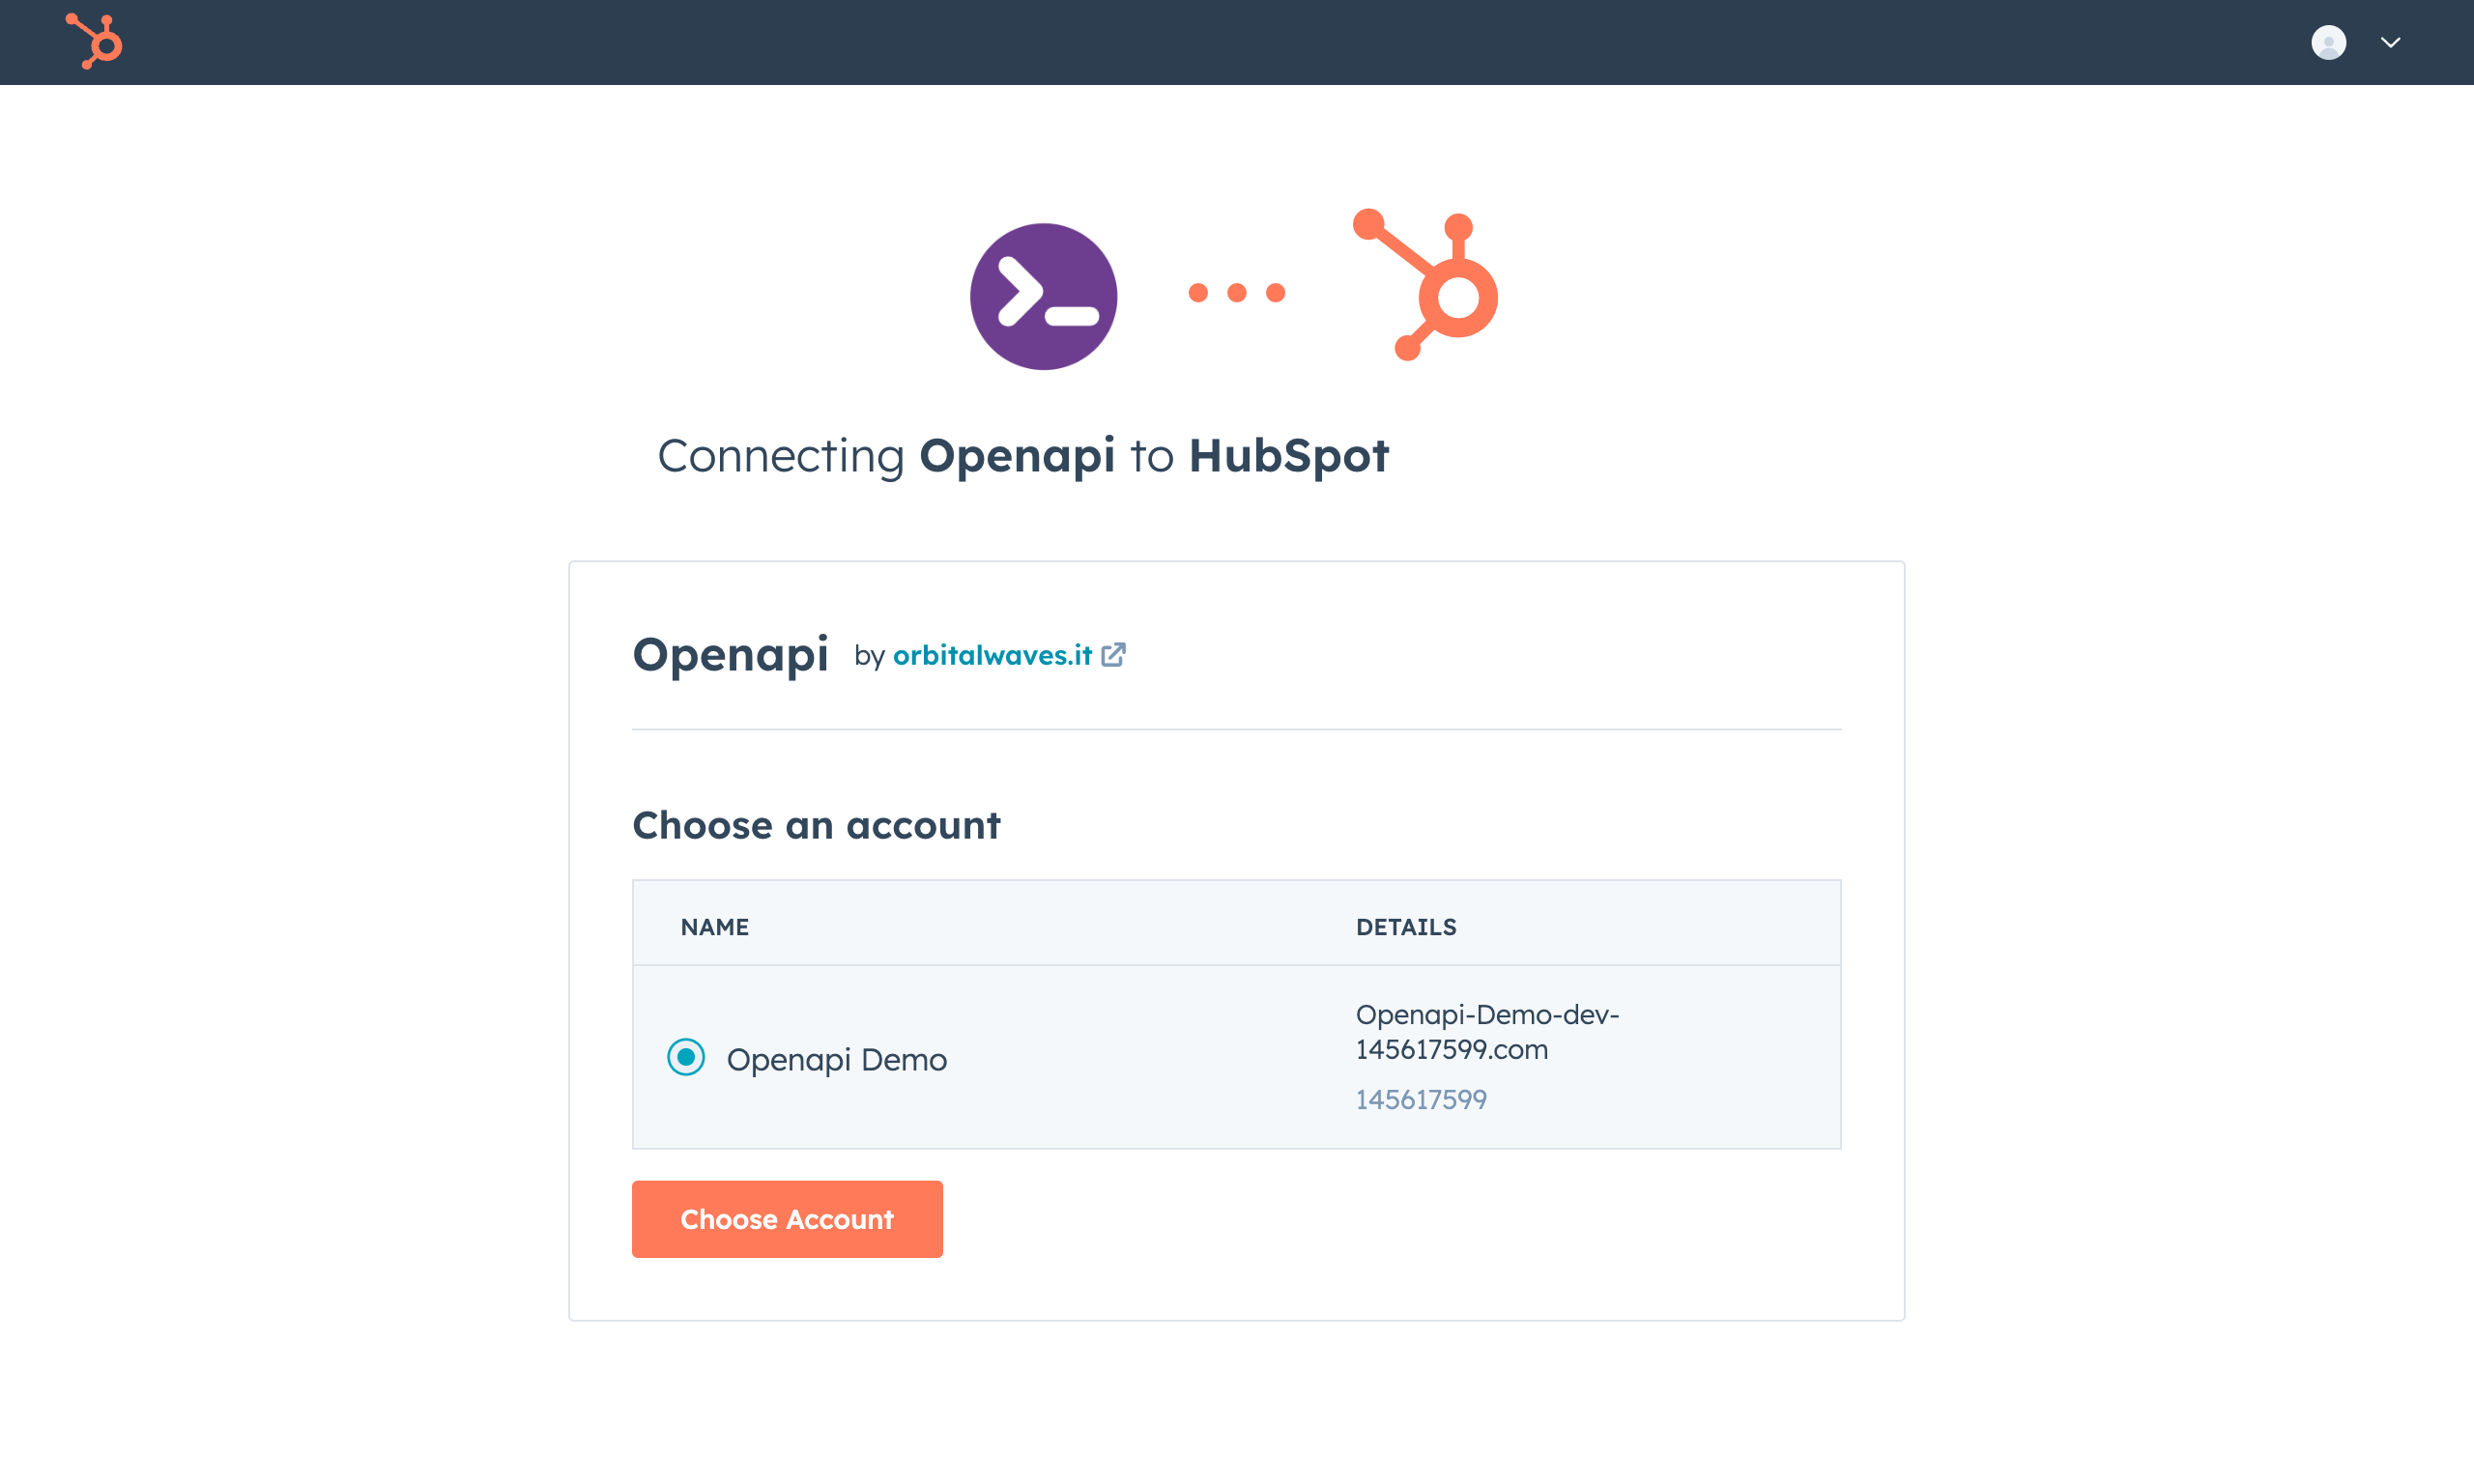
Install the app from the app store, or the app connection page
Select the portal you want to connect and click "Choose Account"
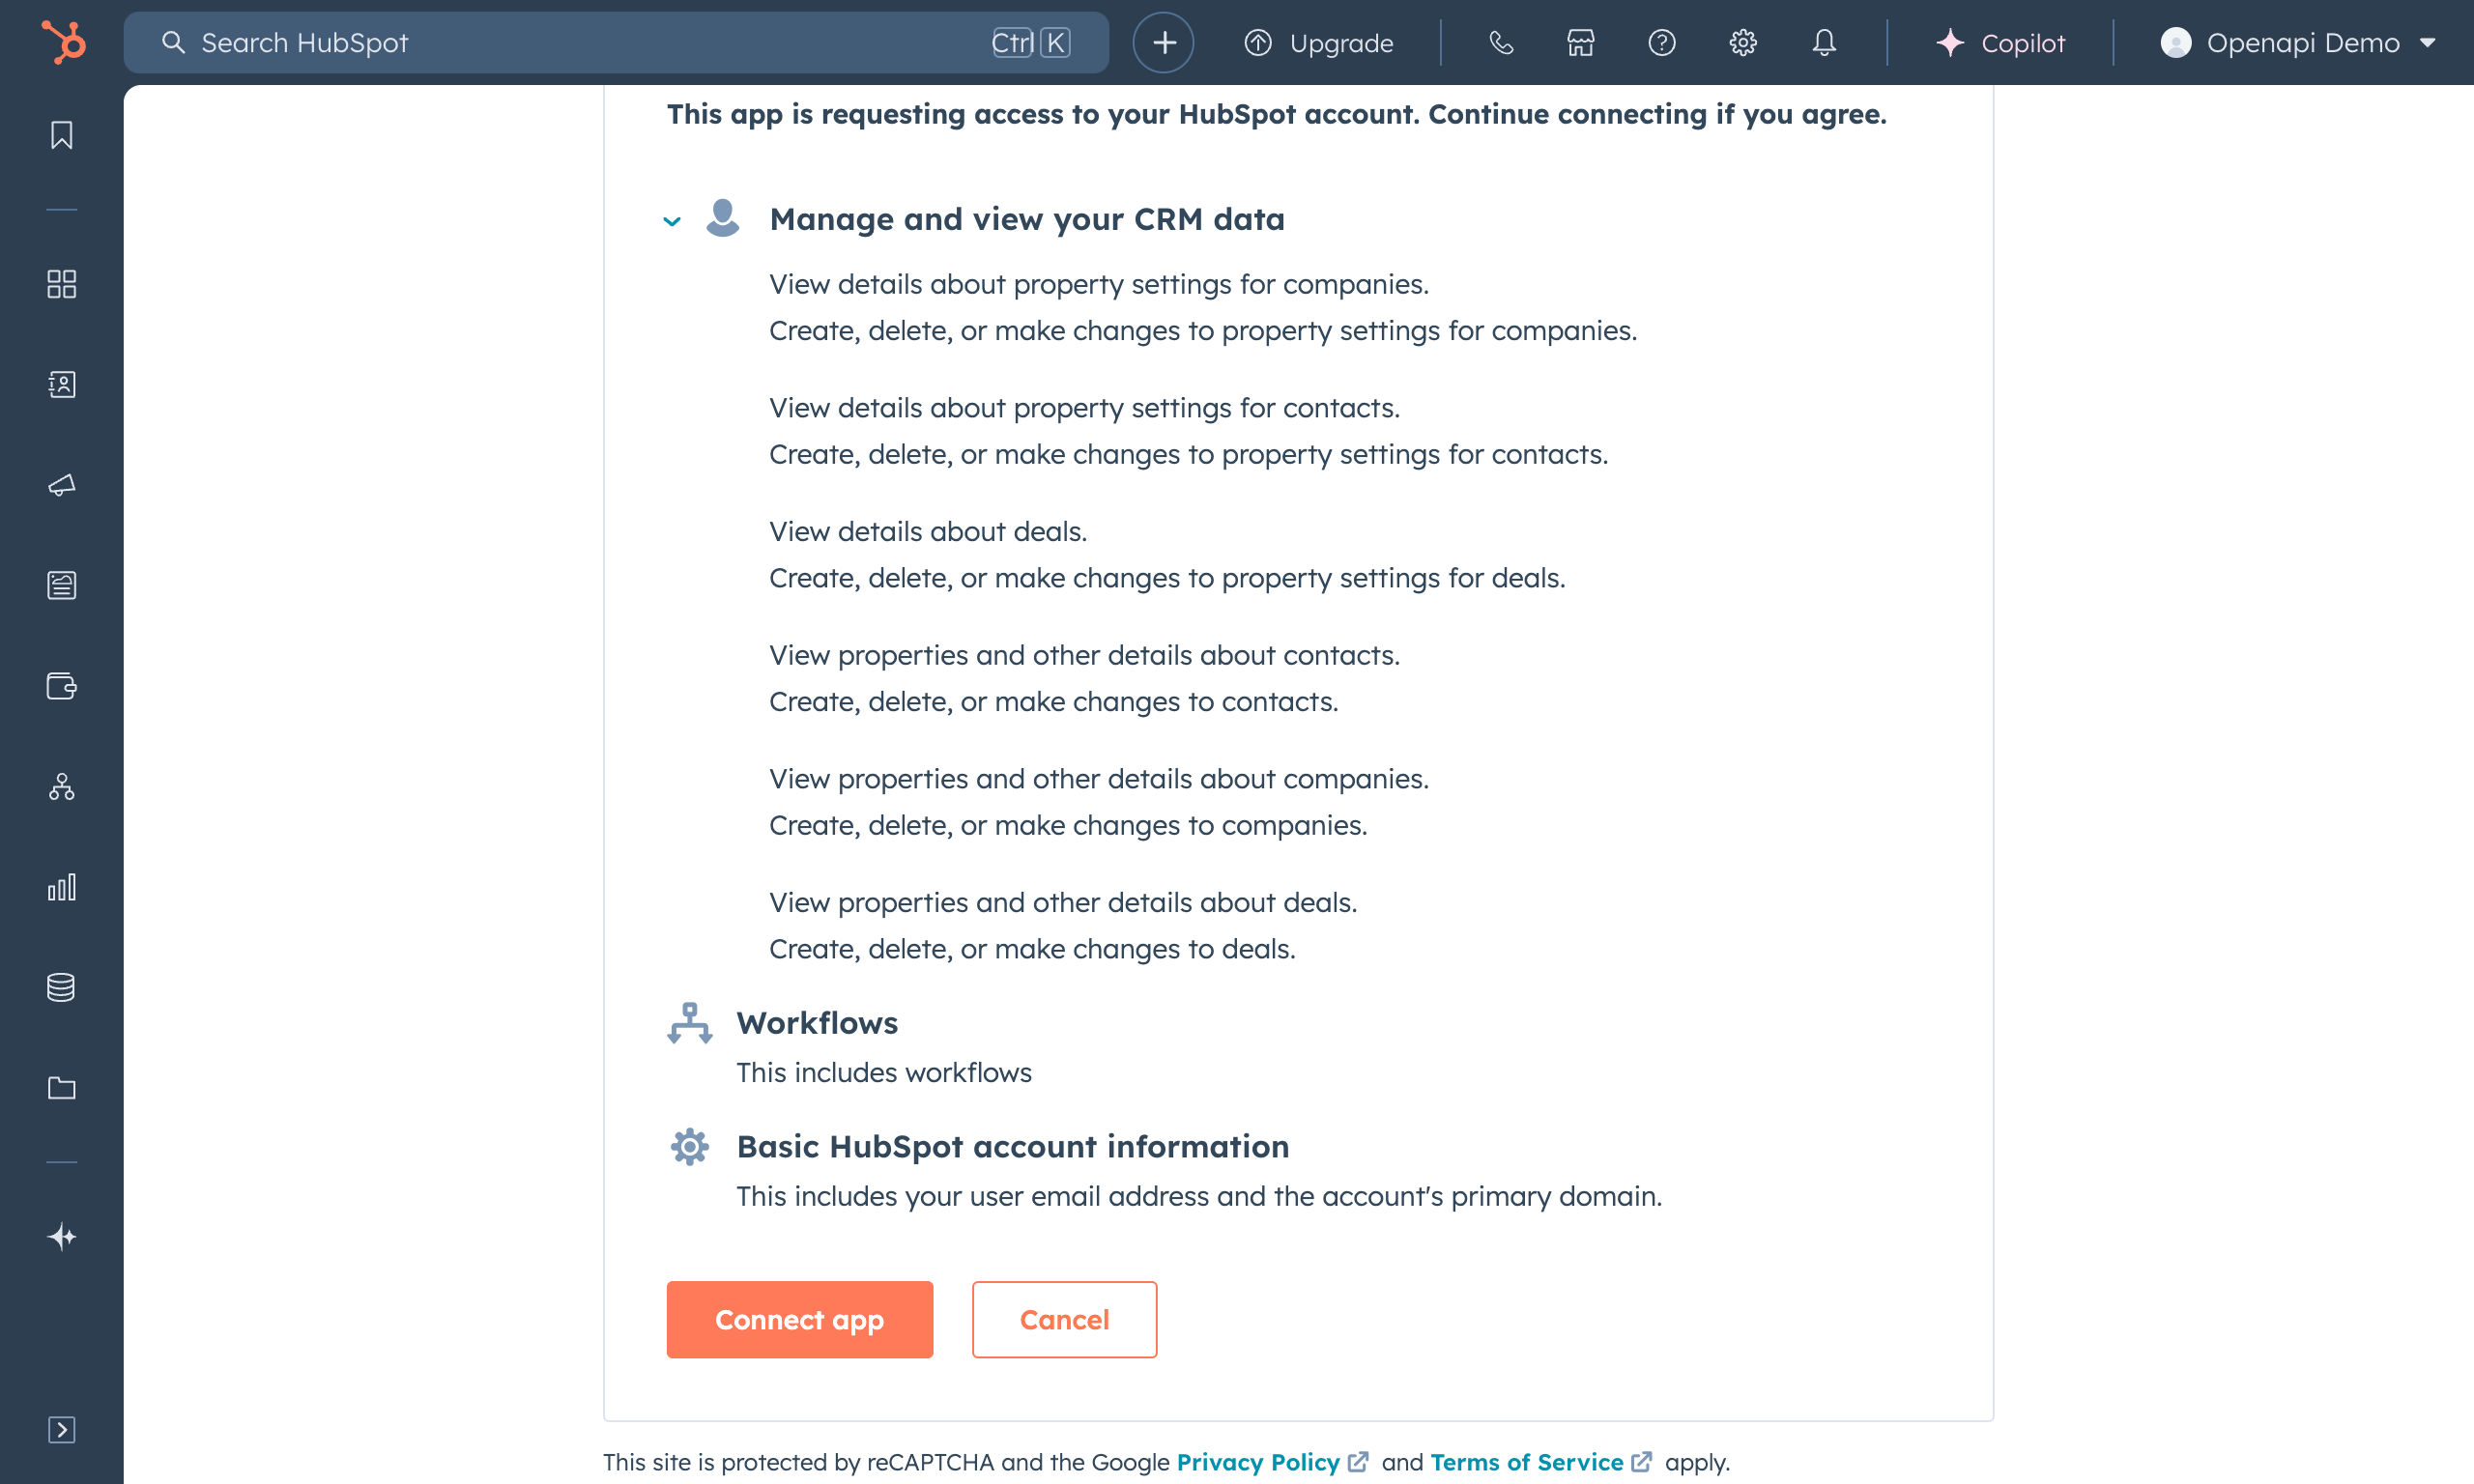
Confirm connection
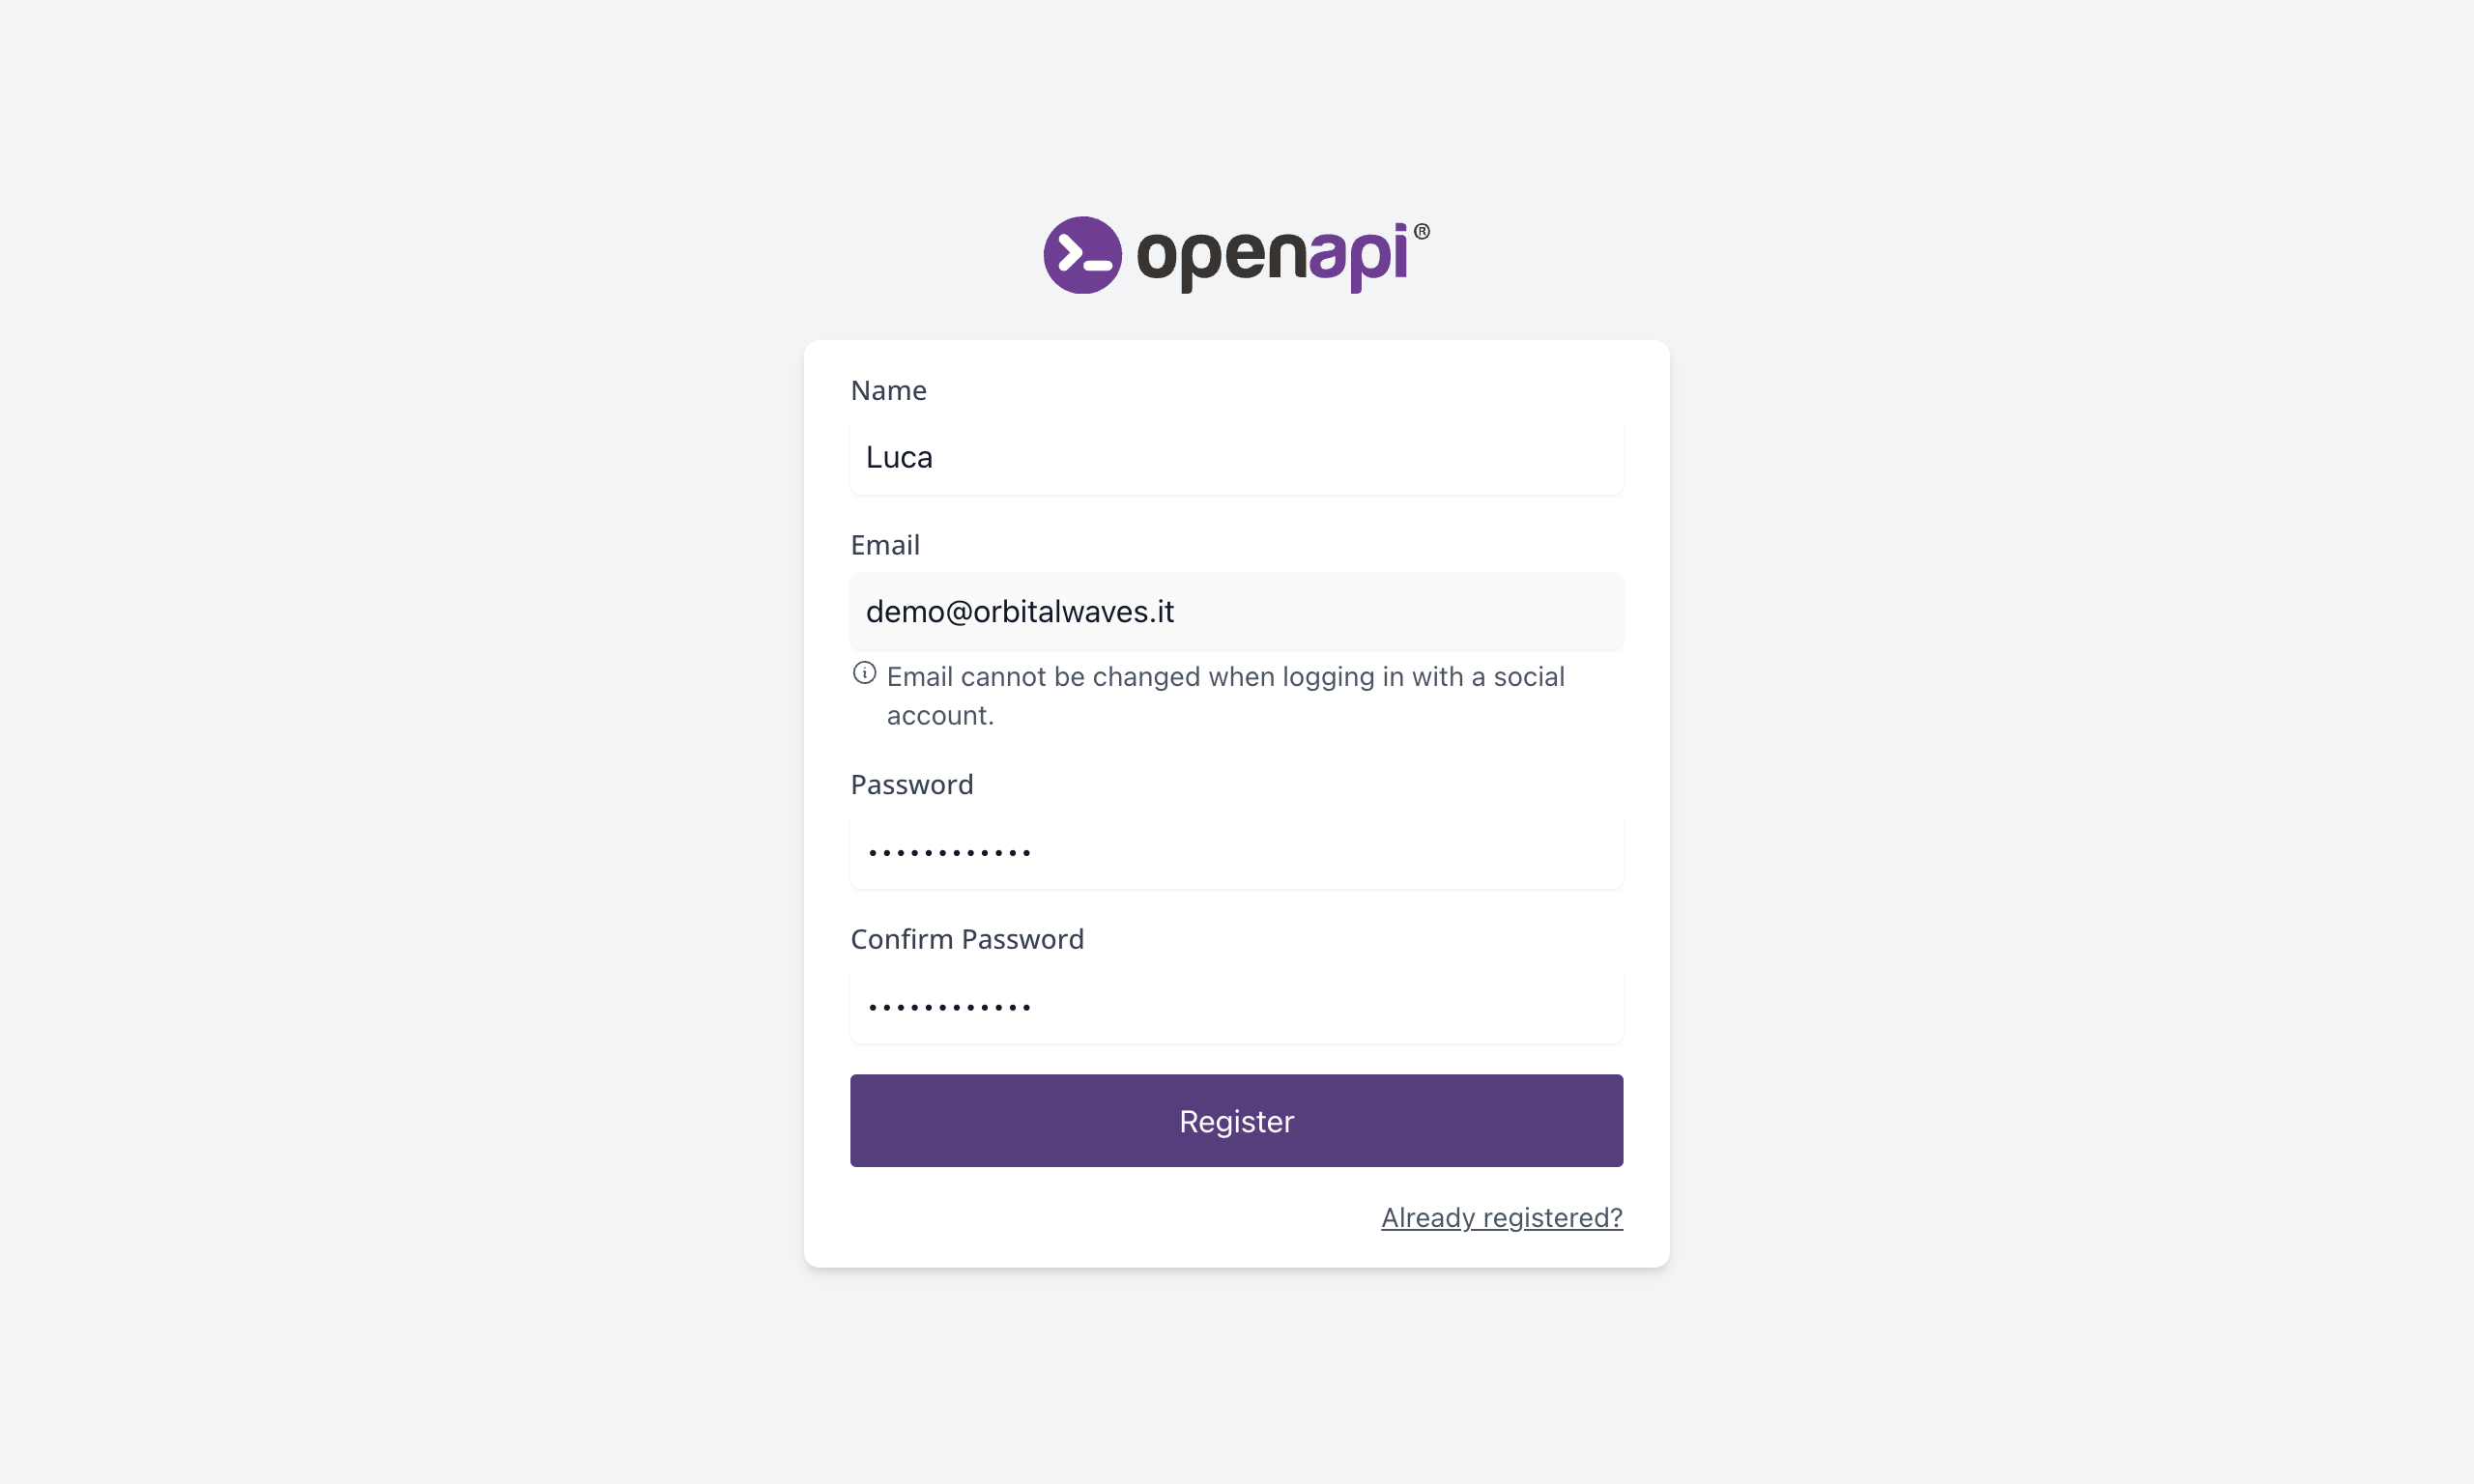
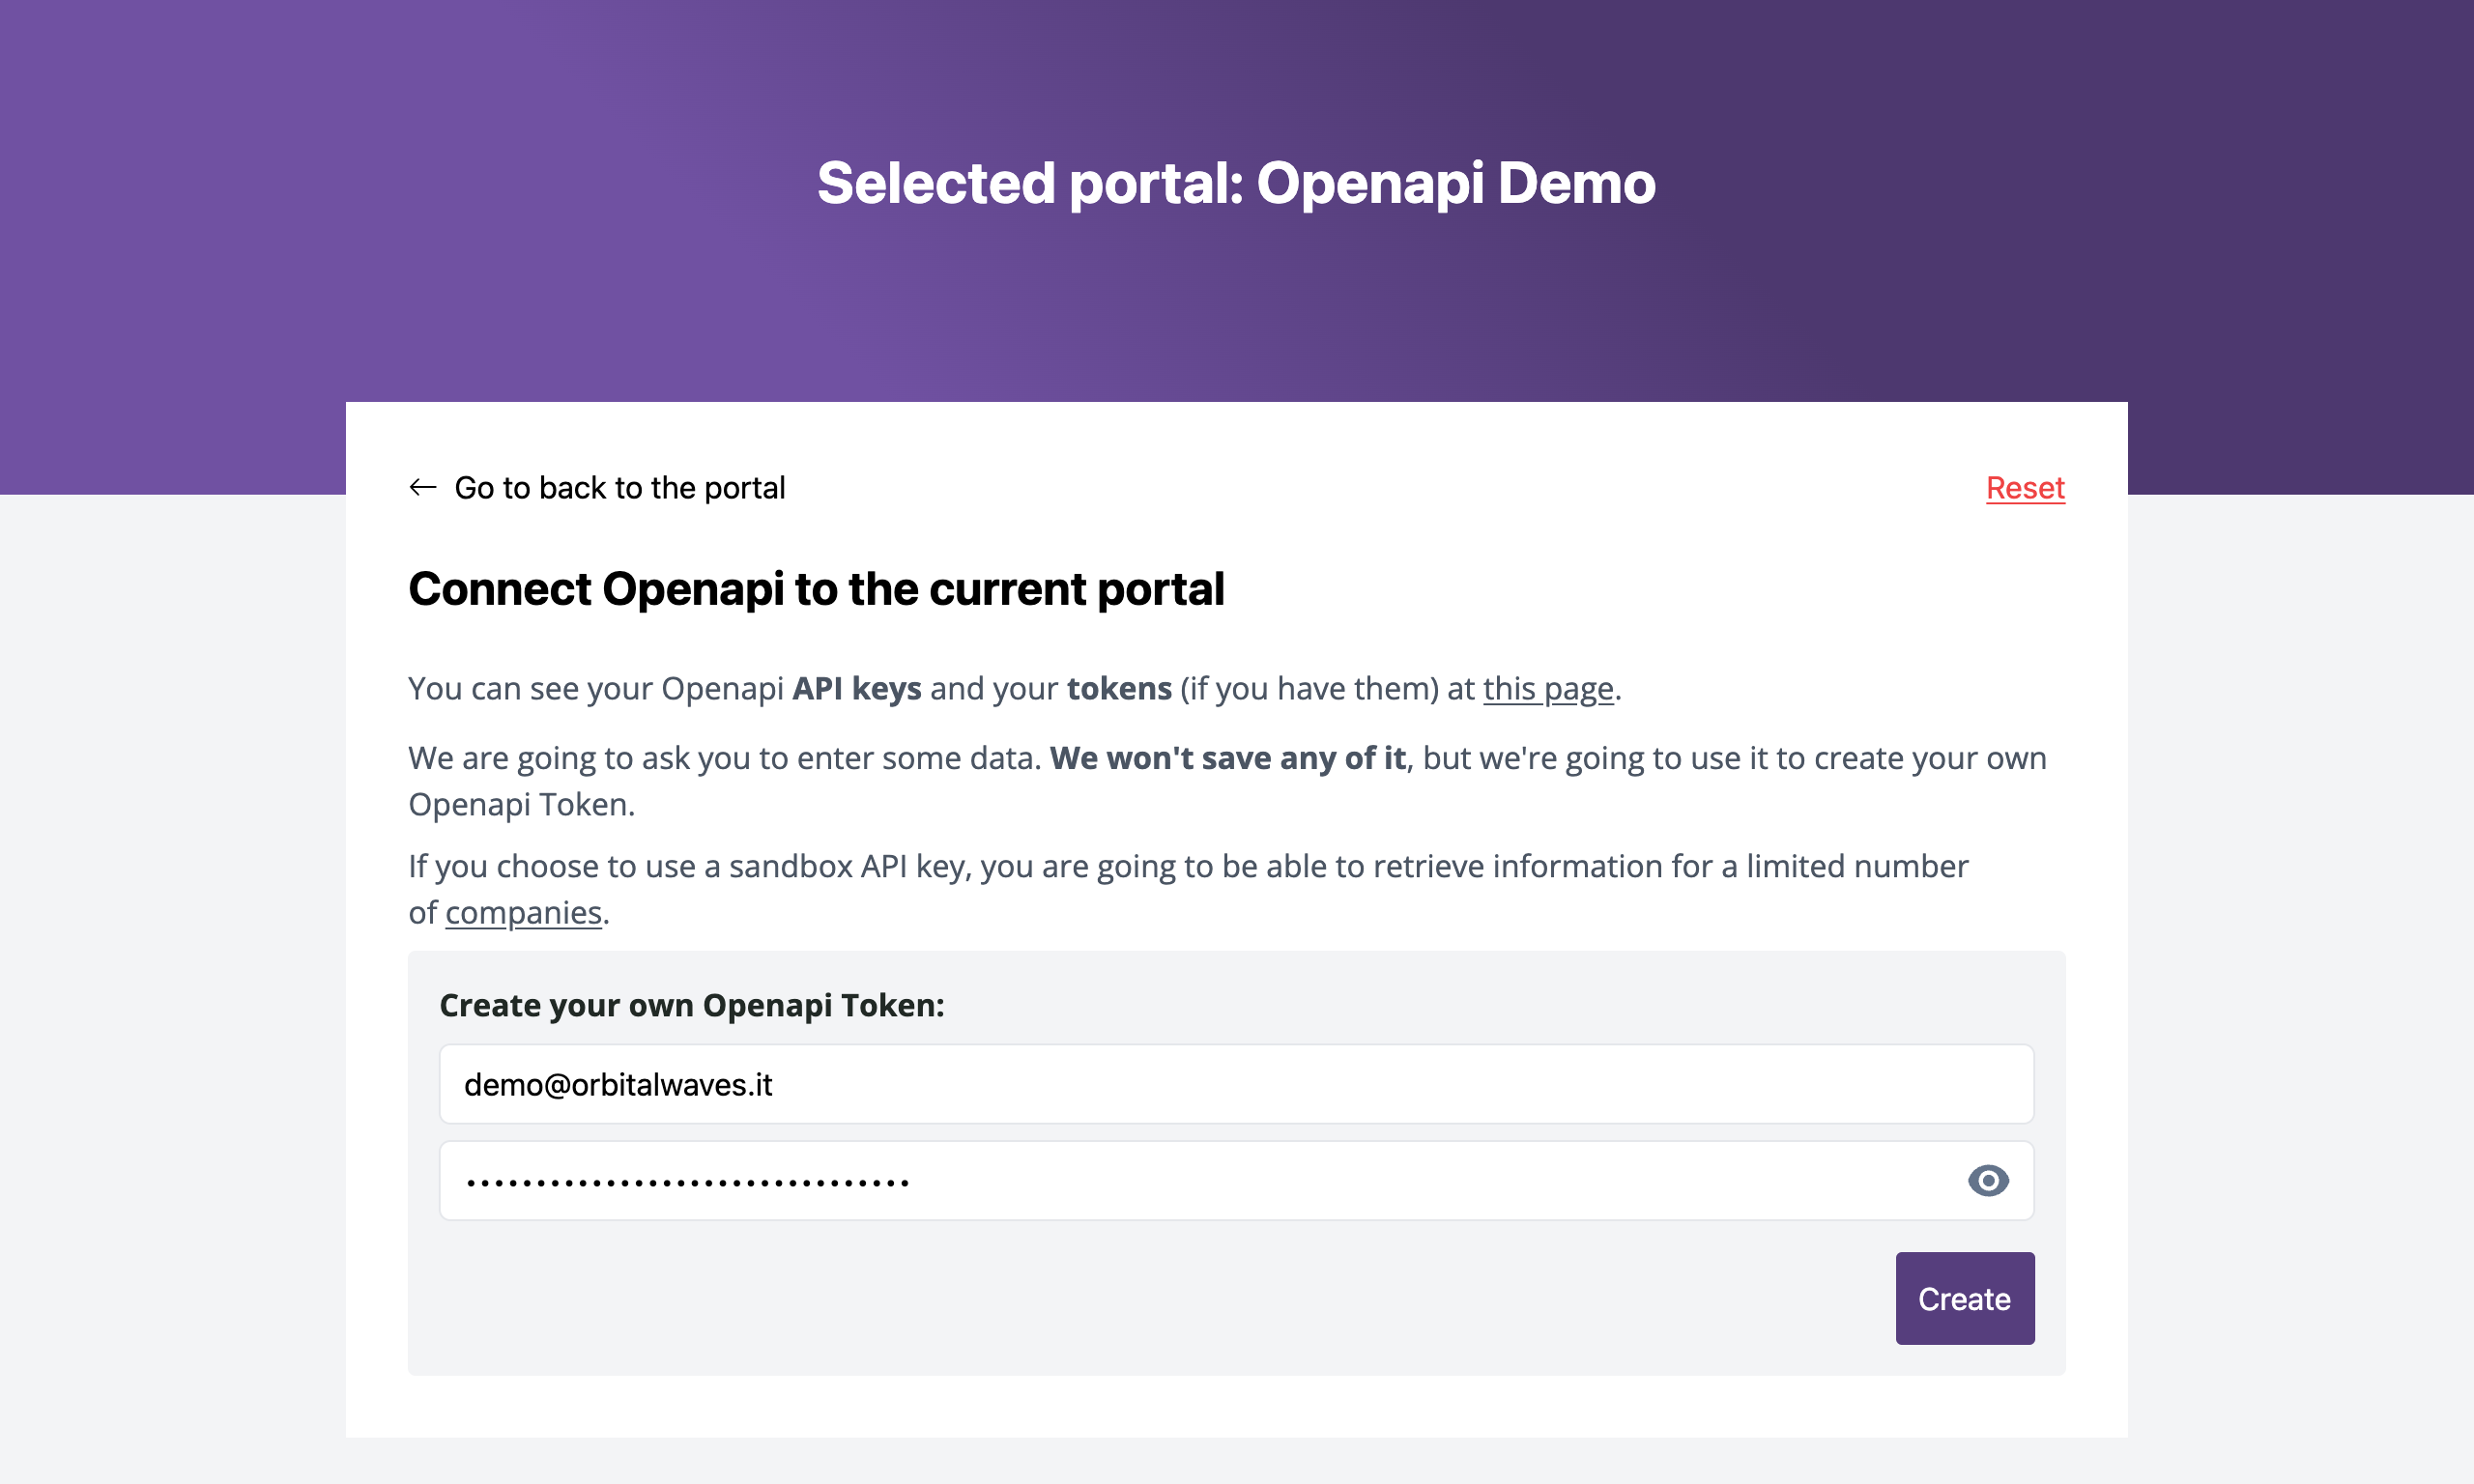
Complete your data and click "Register"
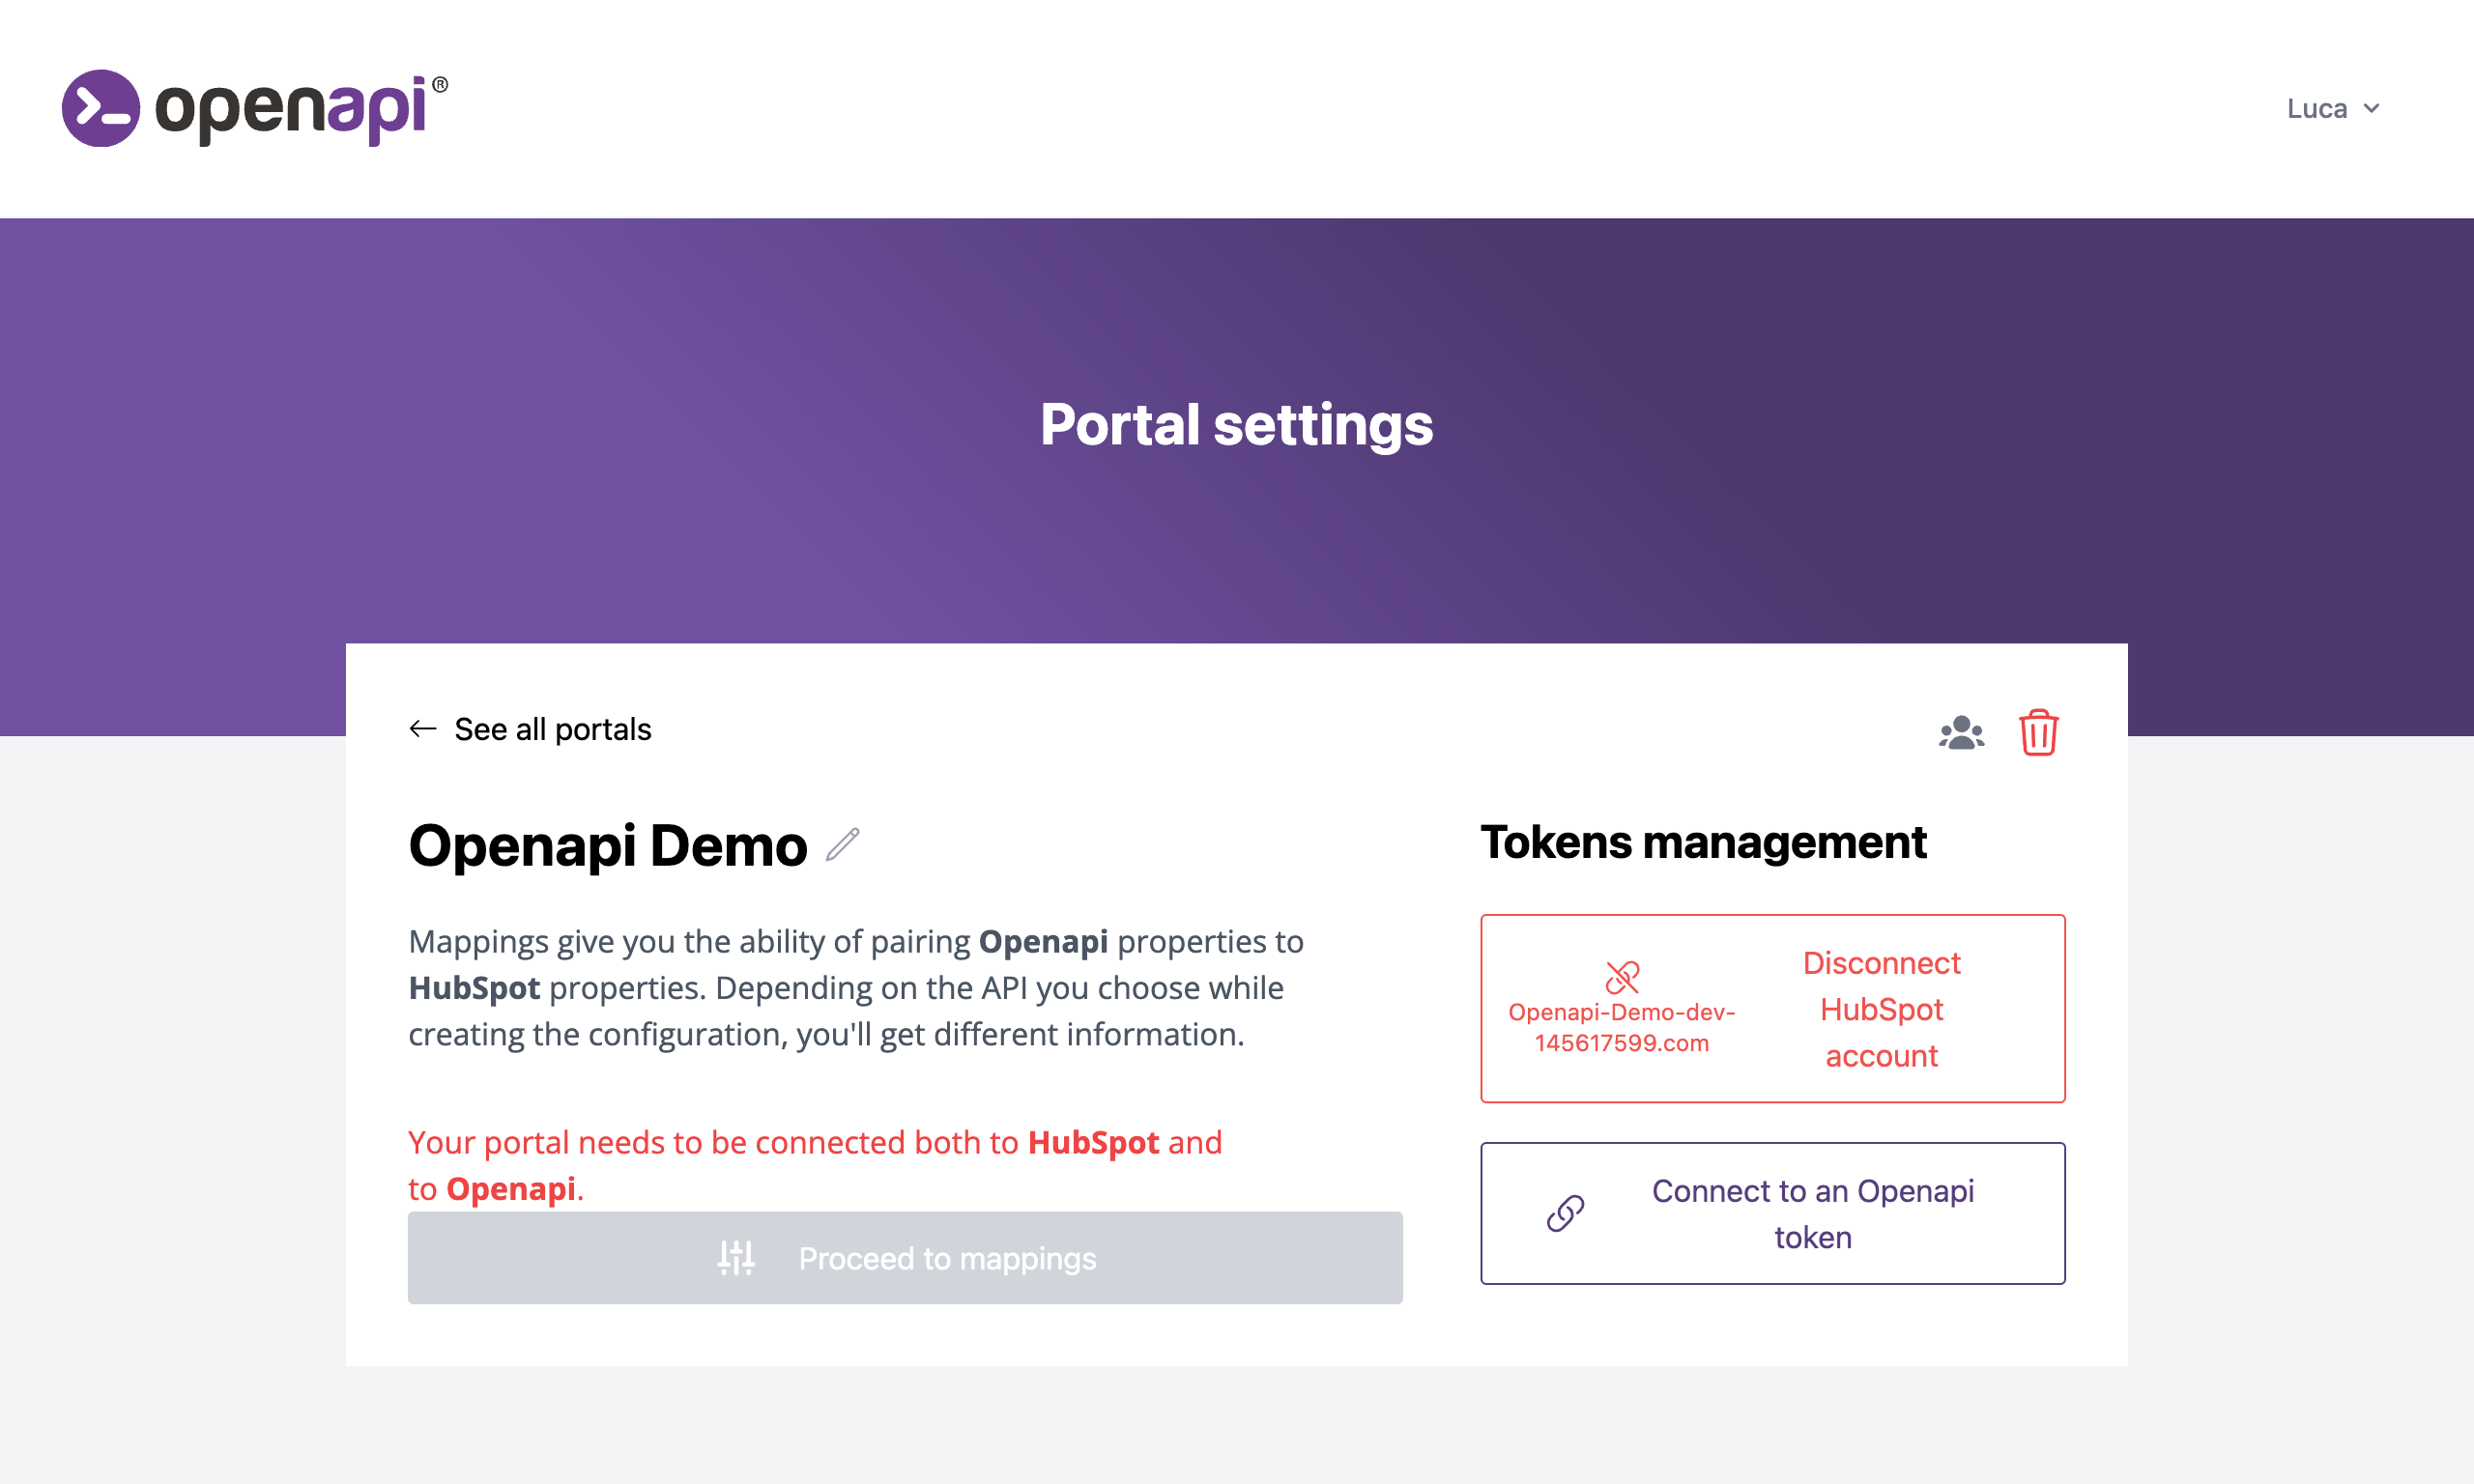
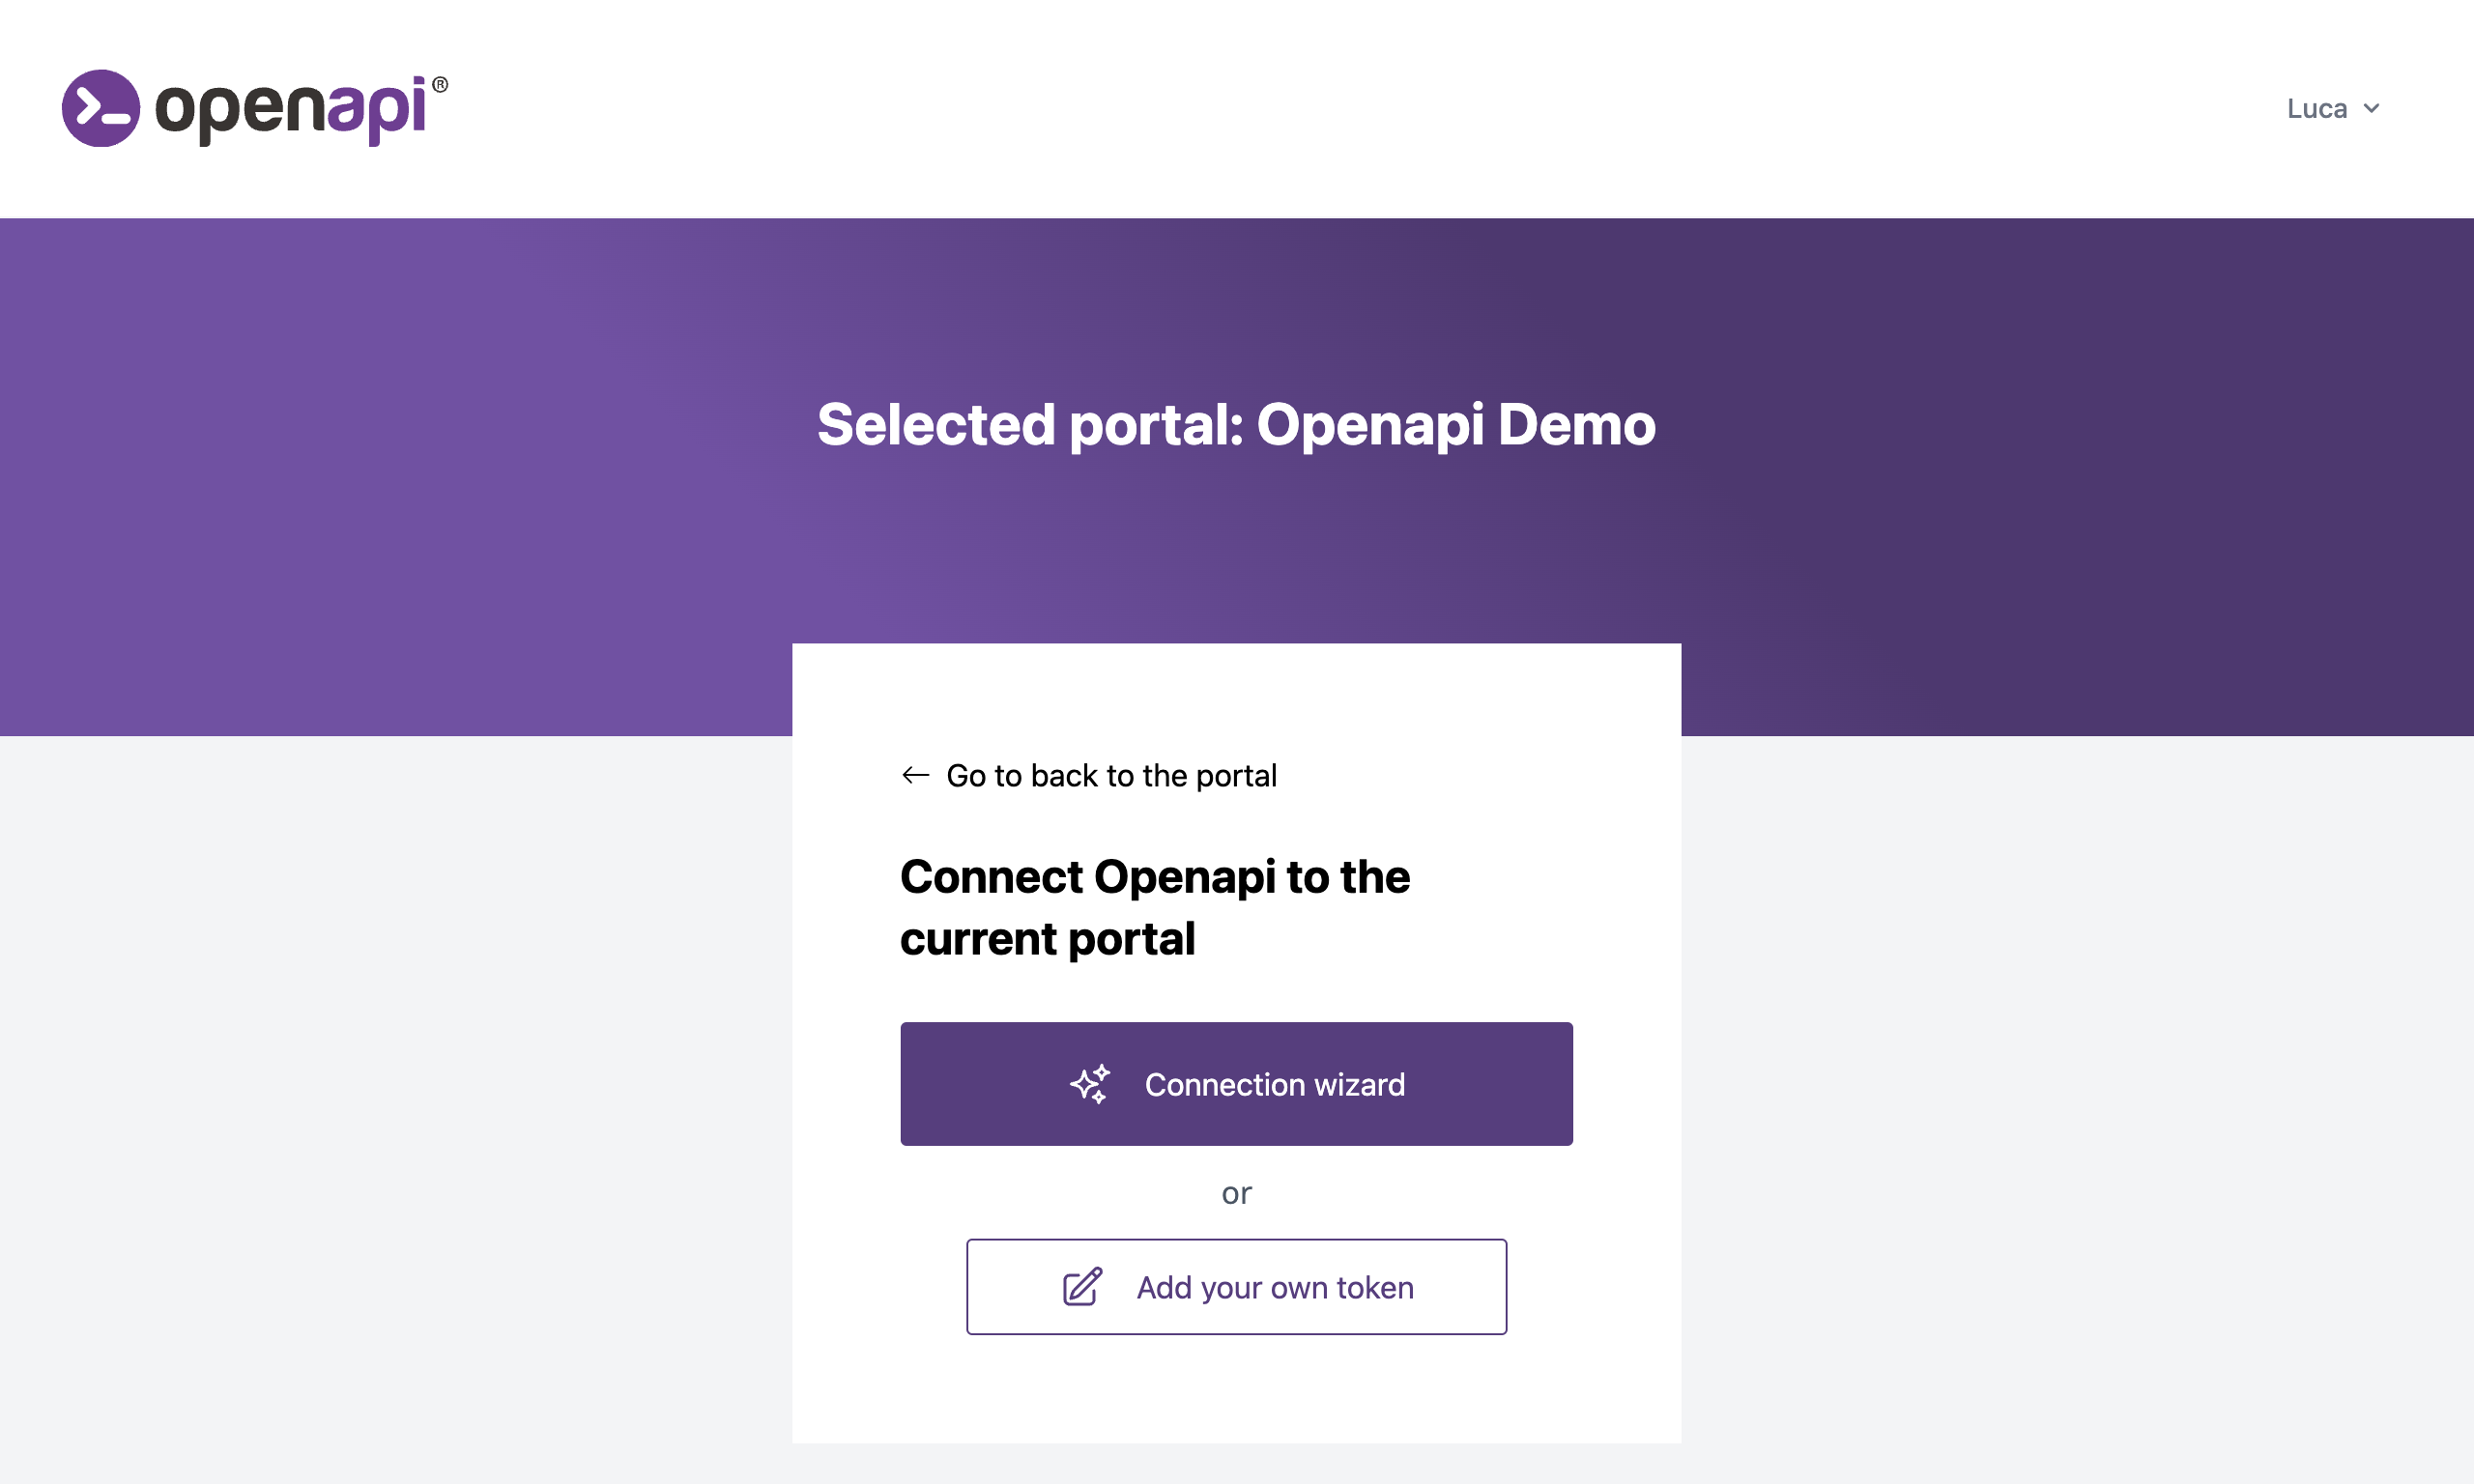
Start Openapi connection
Start the connection wizard
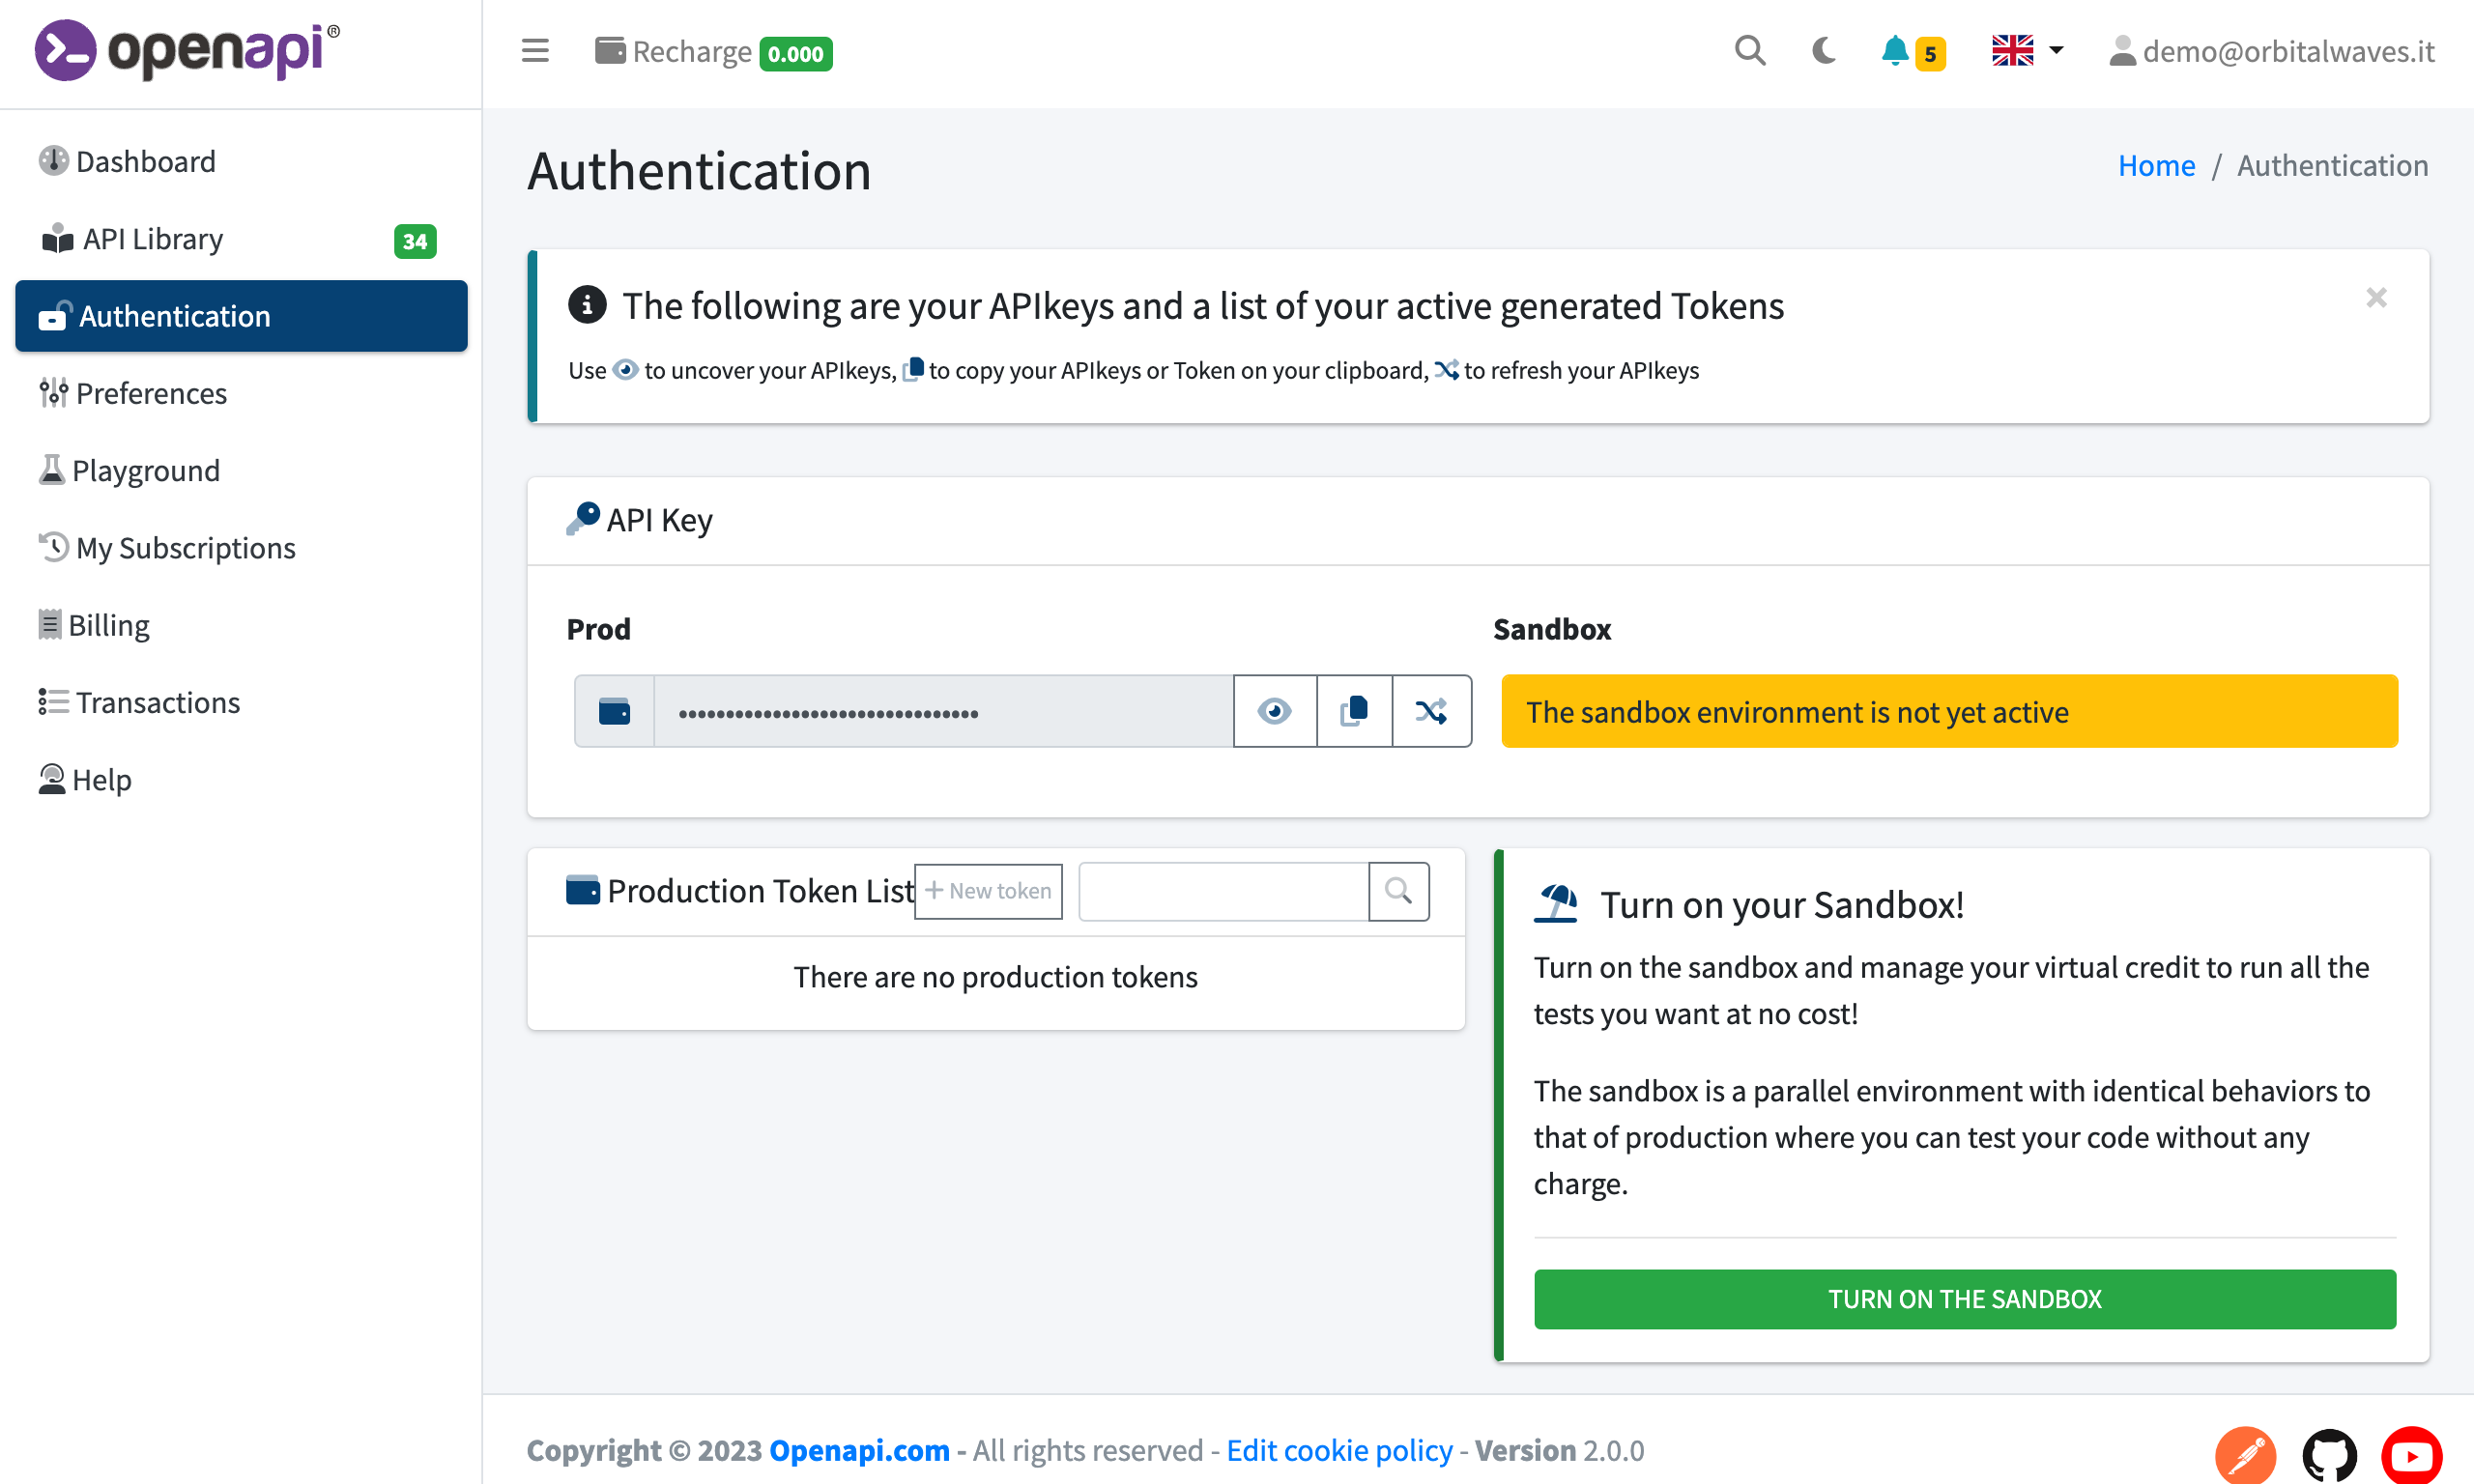
Go to your Openapi Console and copy the Production API Key
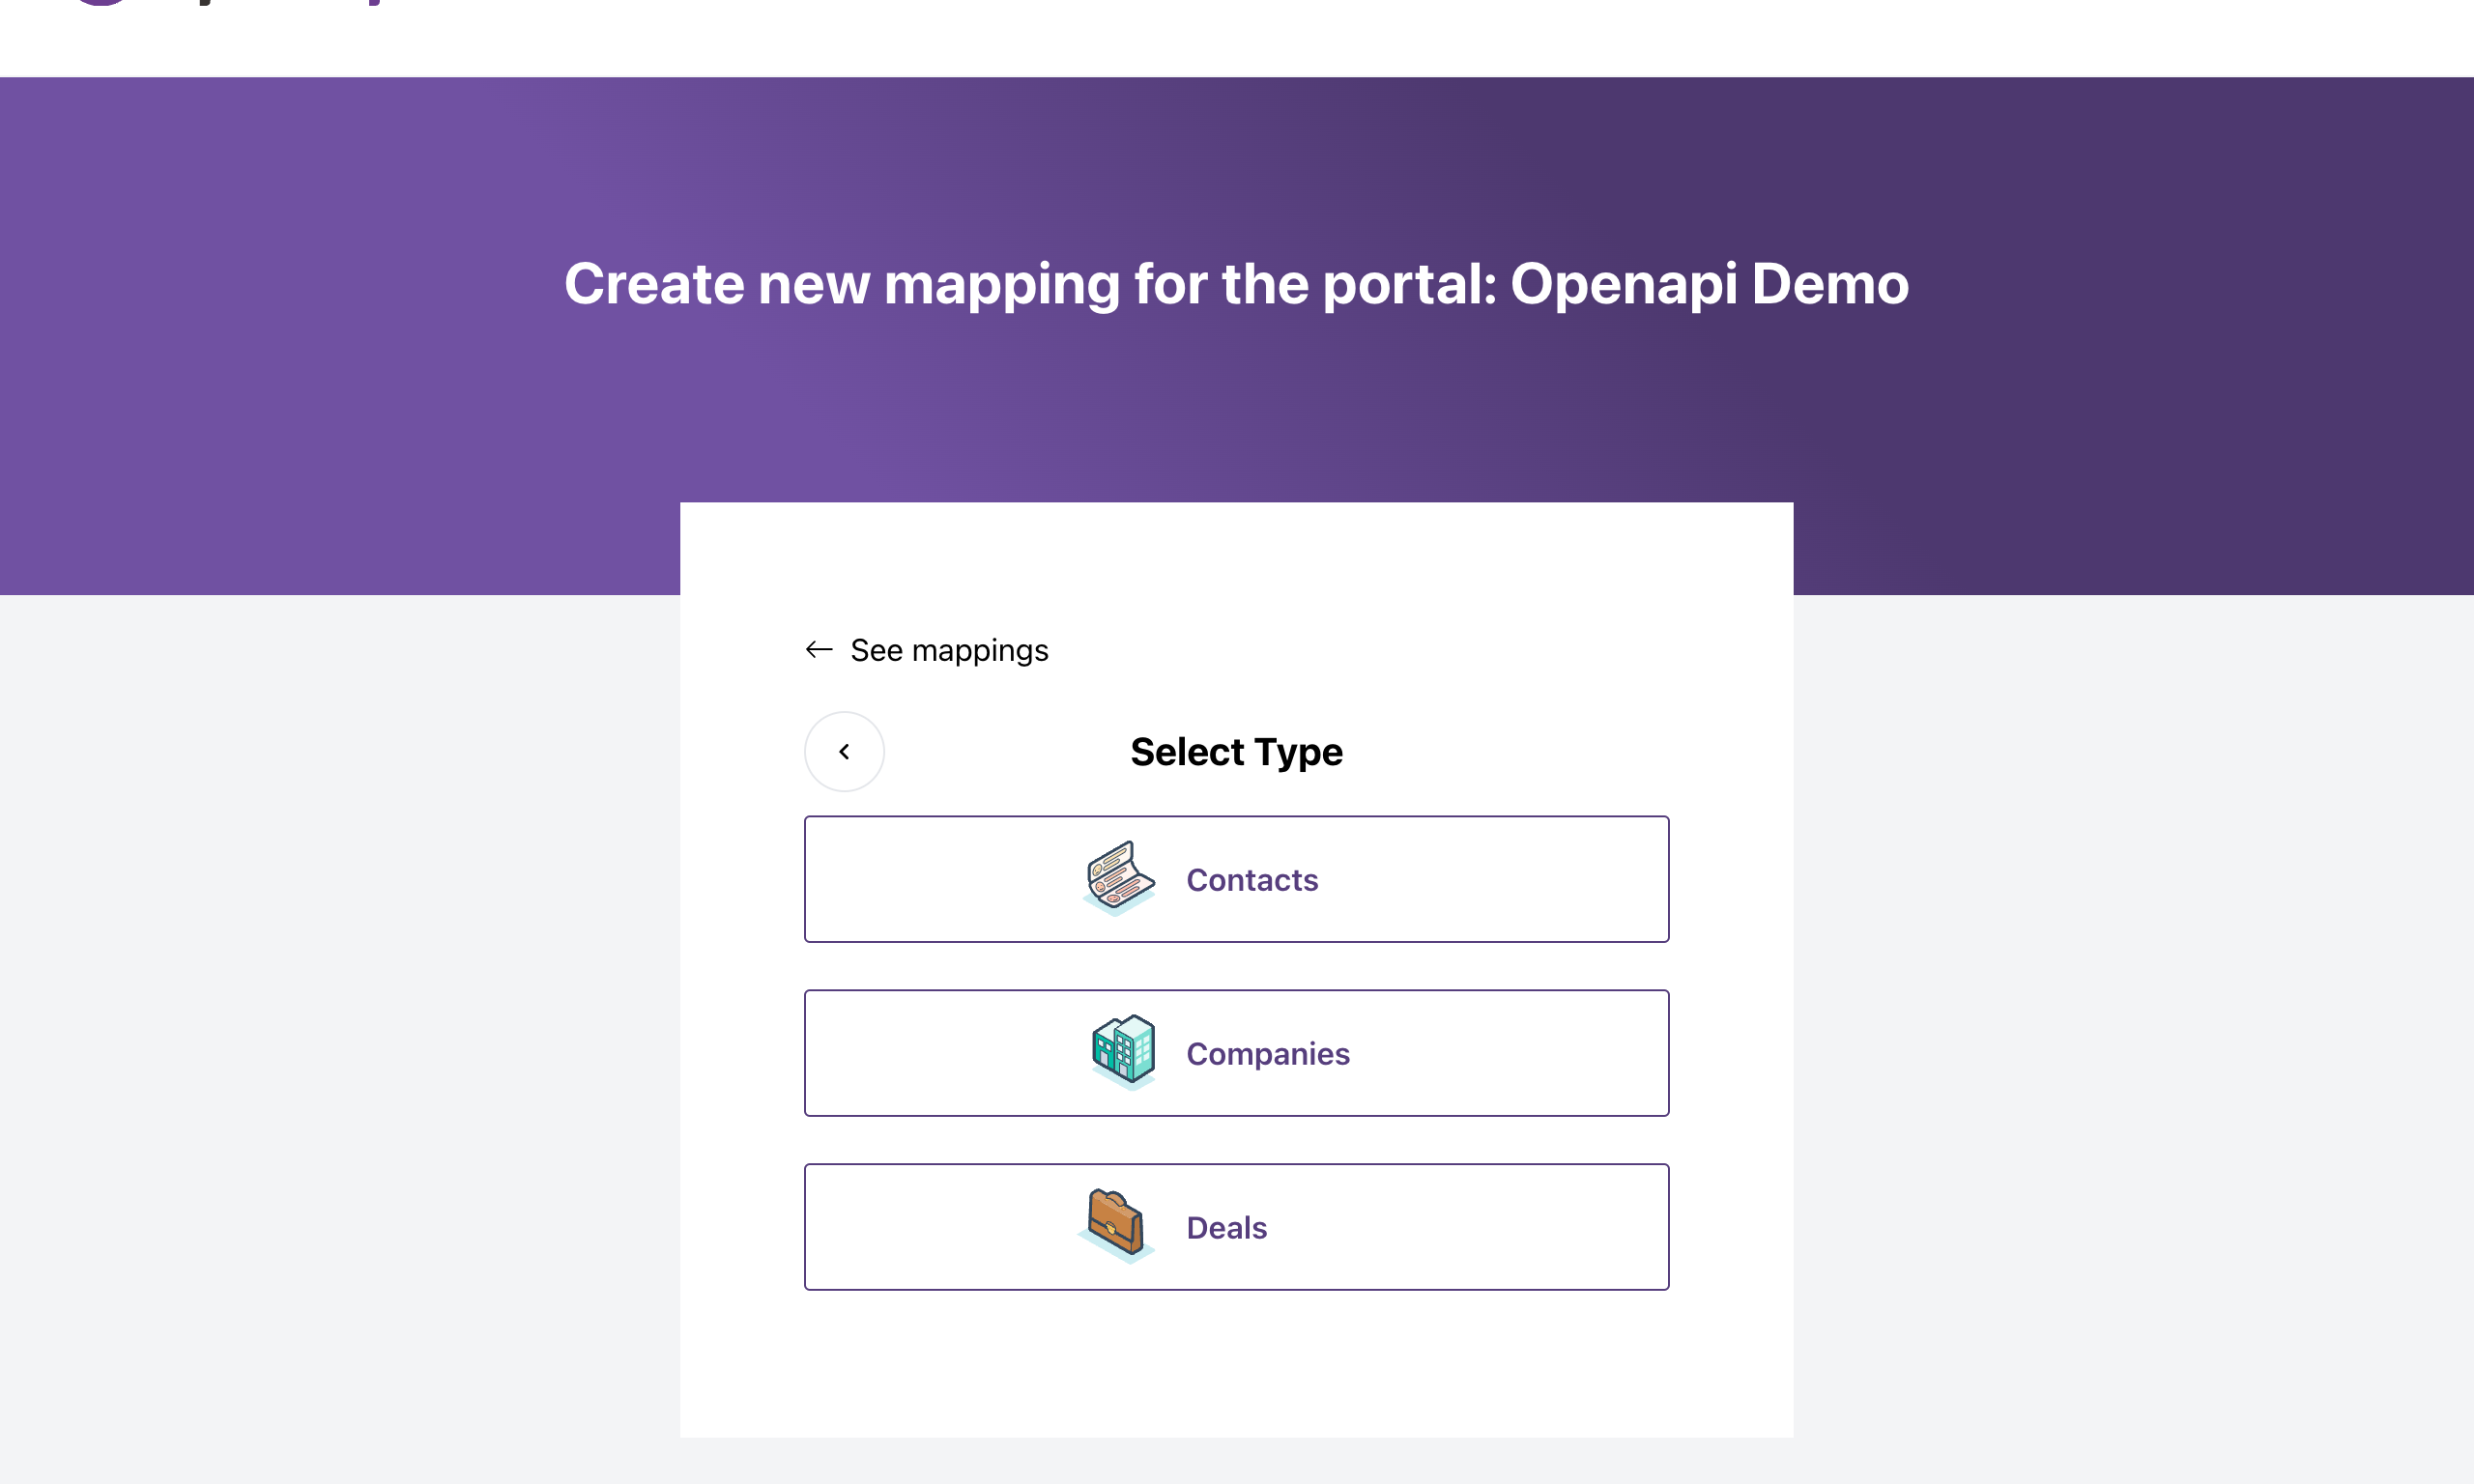
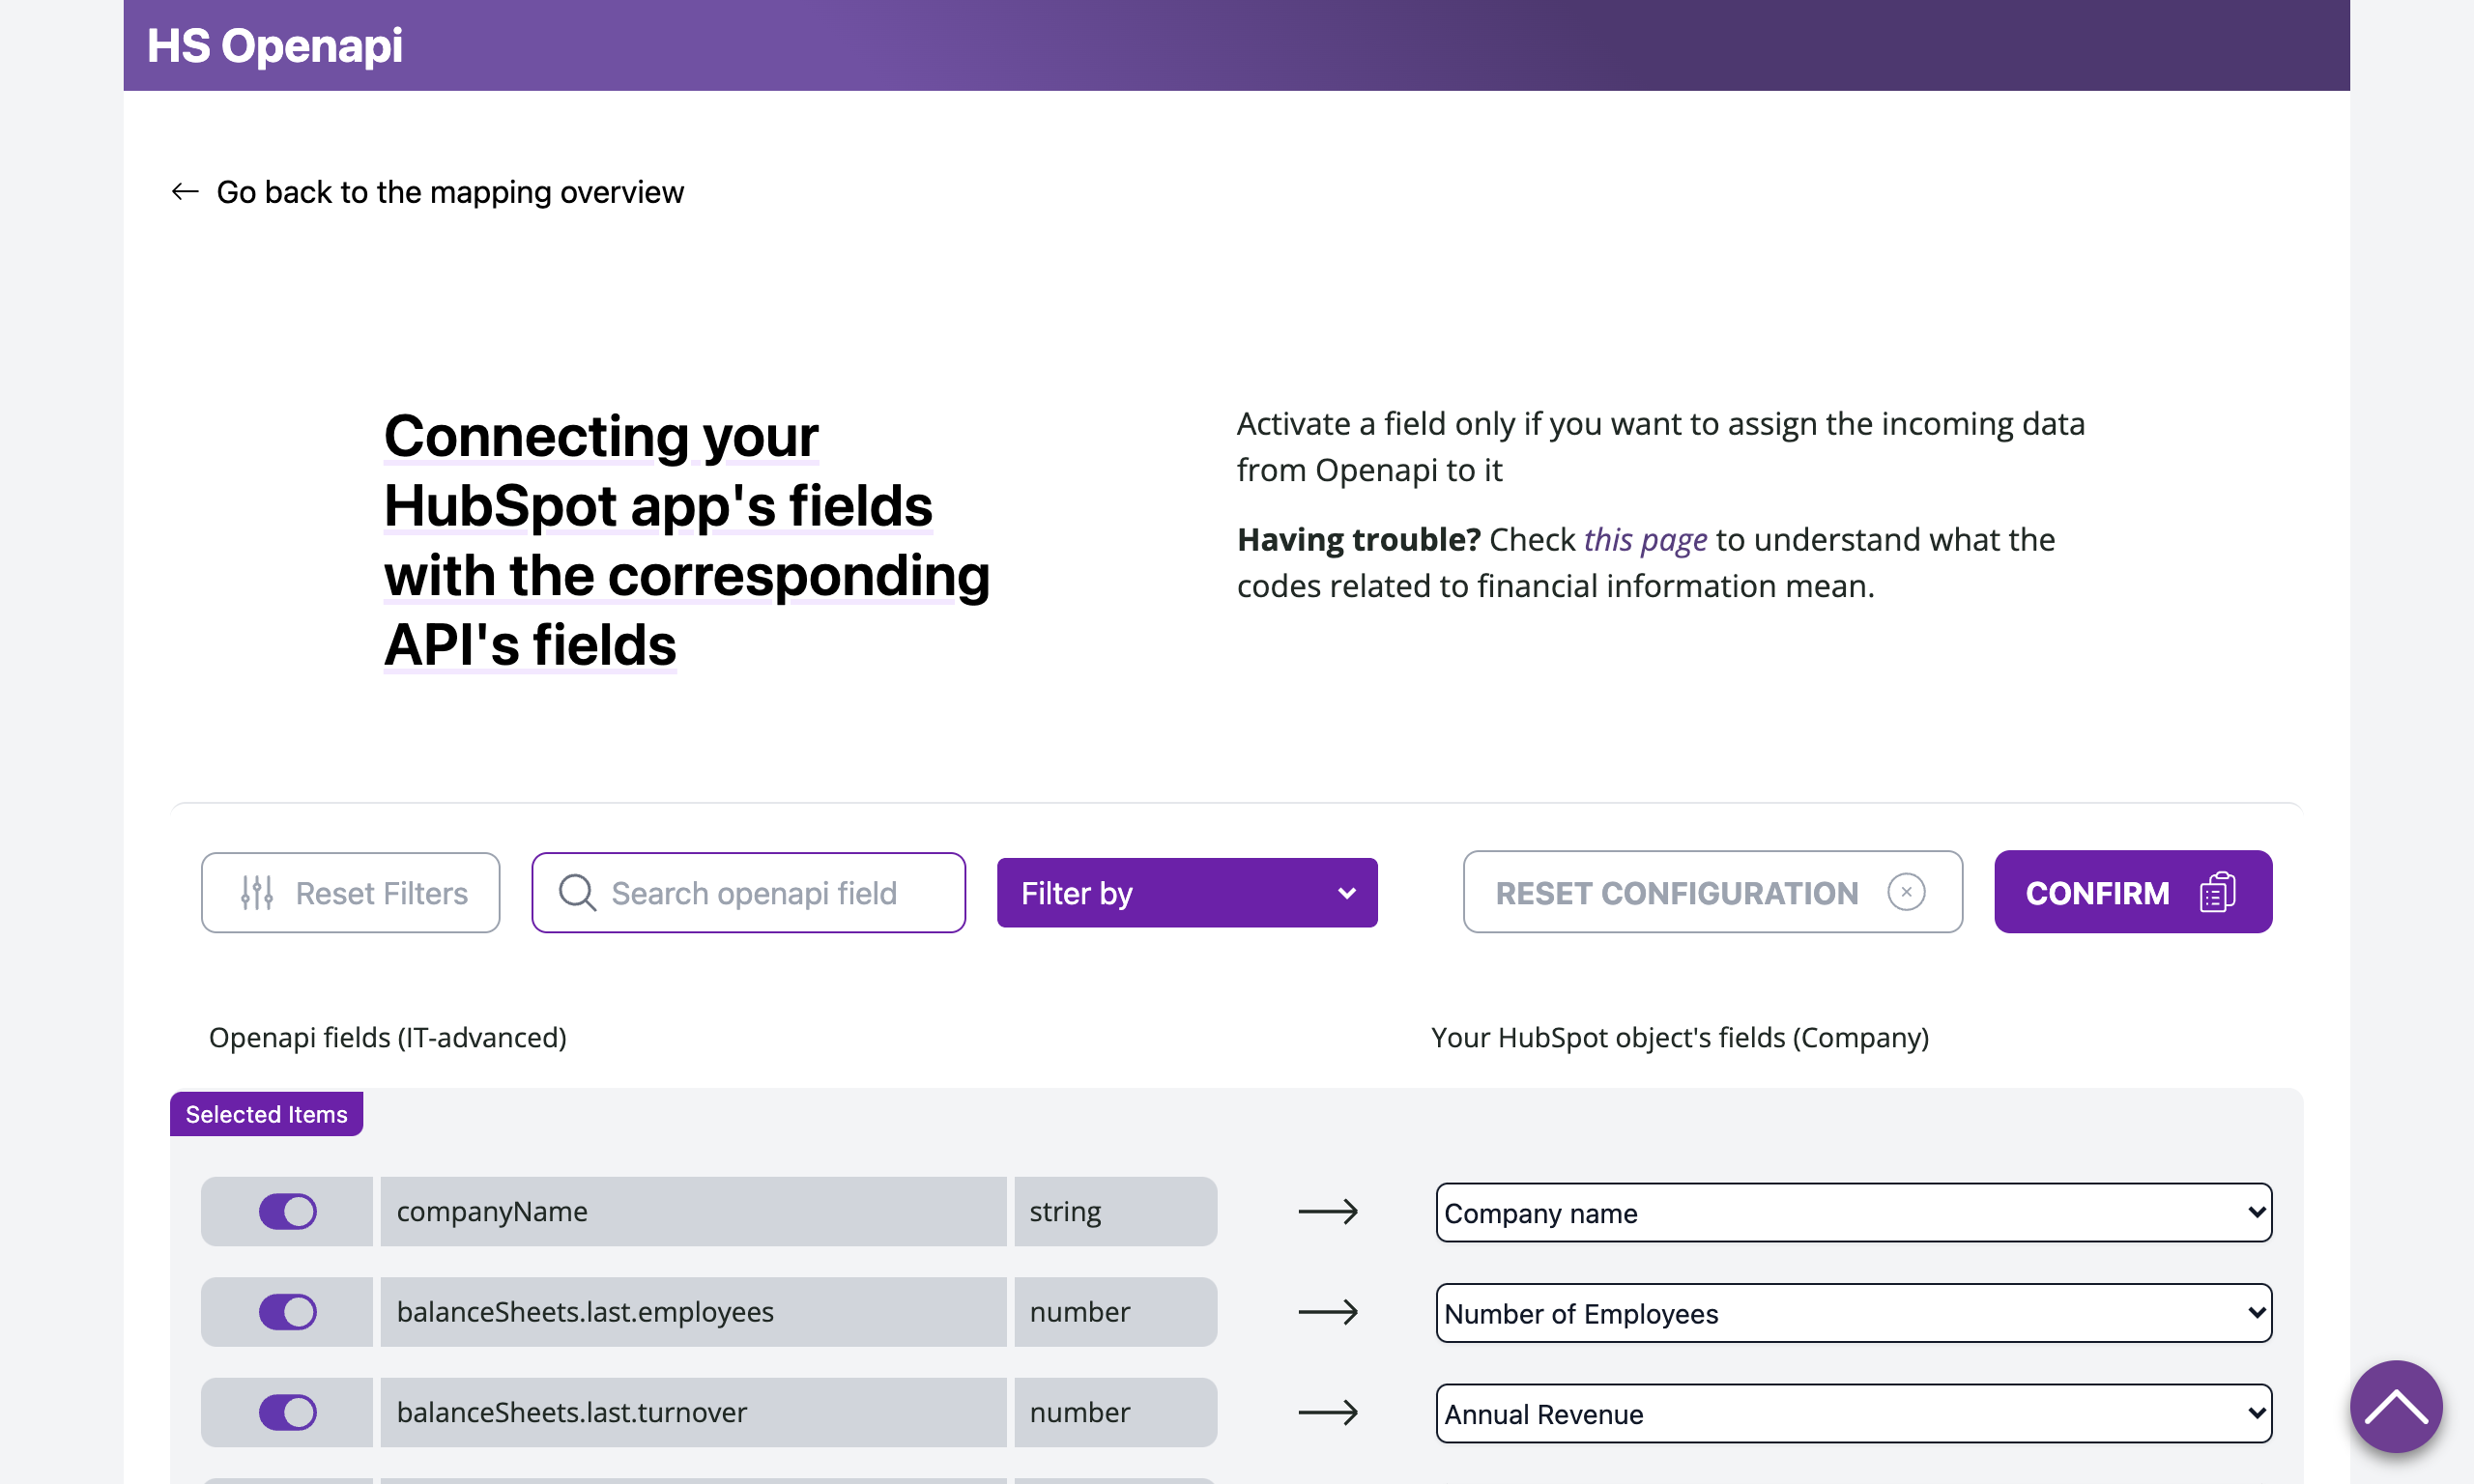
Activate all the fields you want to map from Openapi and select the corresponding HubSpot field.
You can filter and search properties to make it easier.
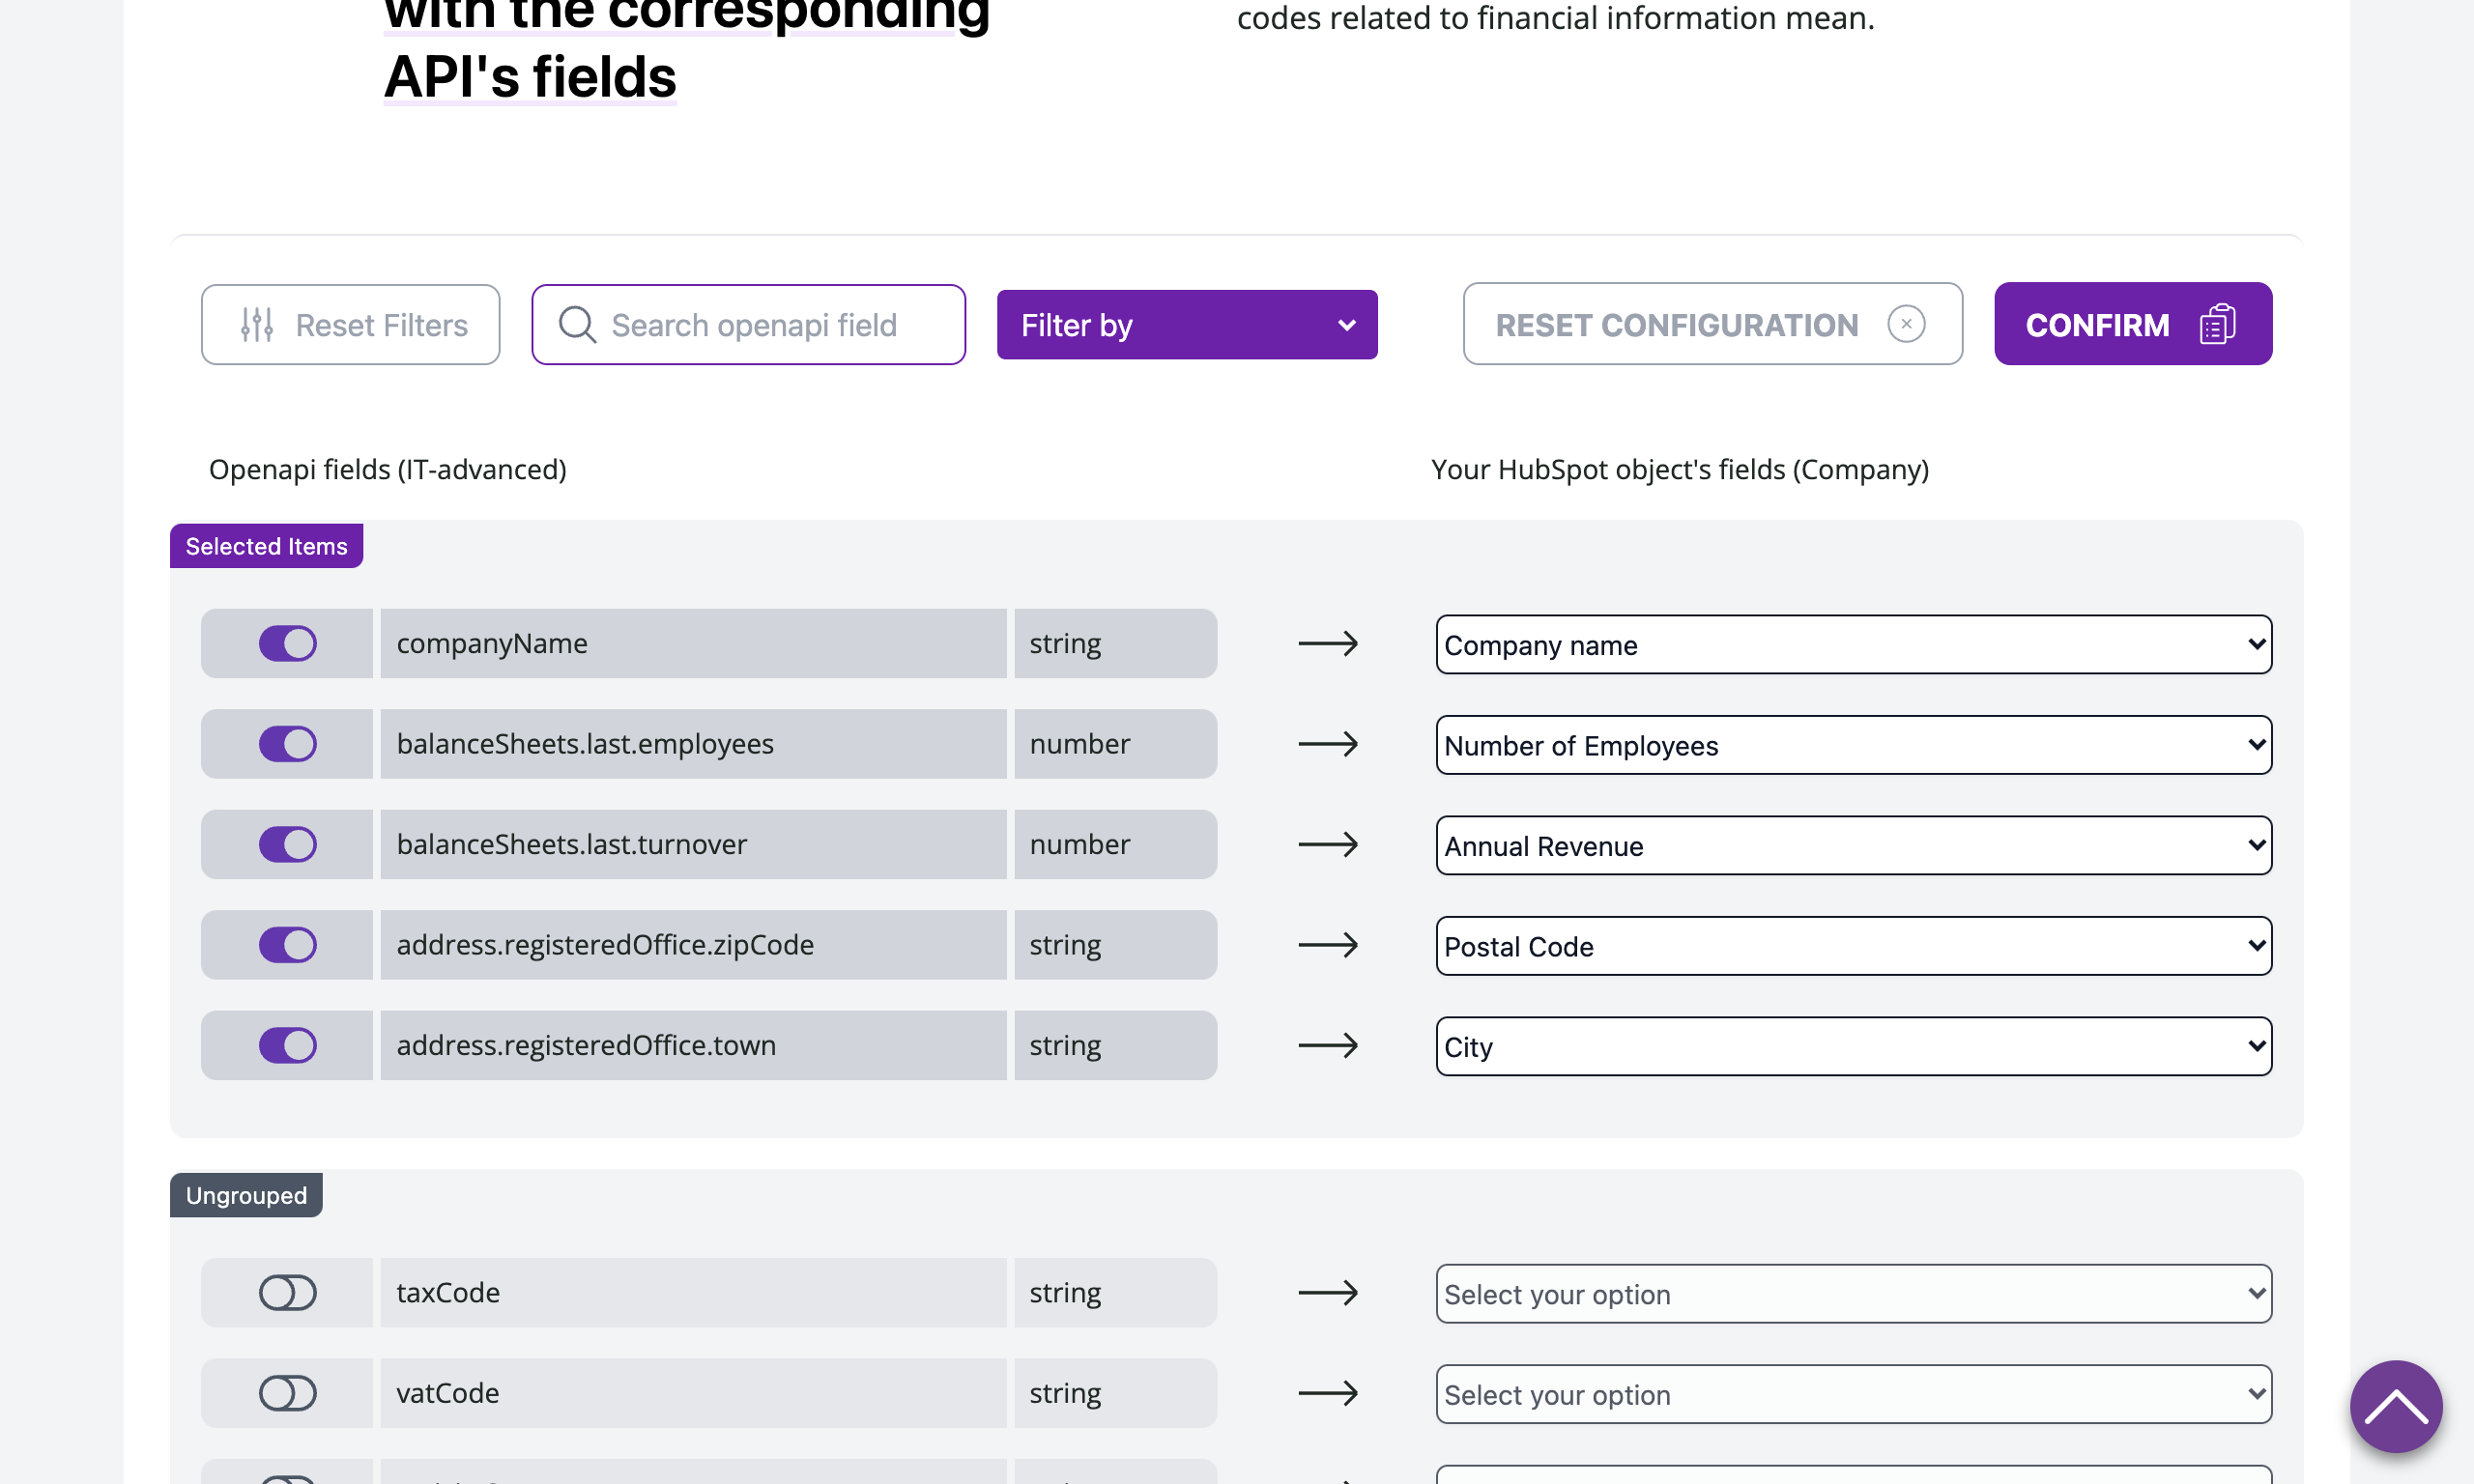
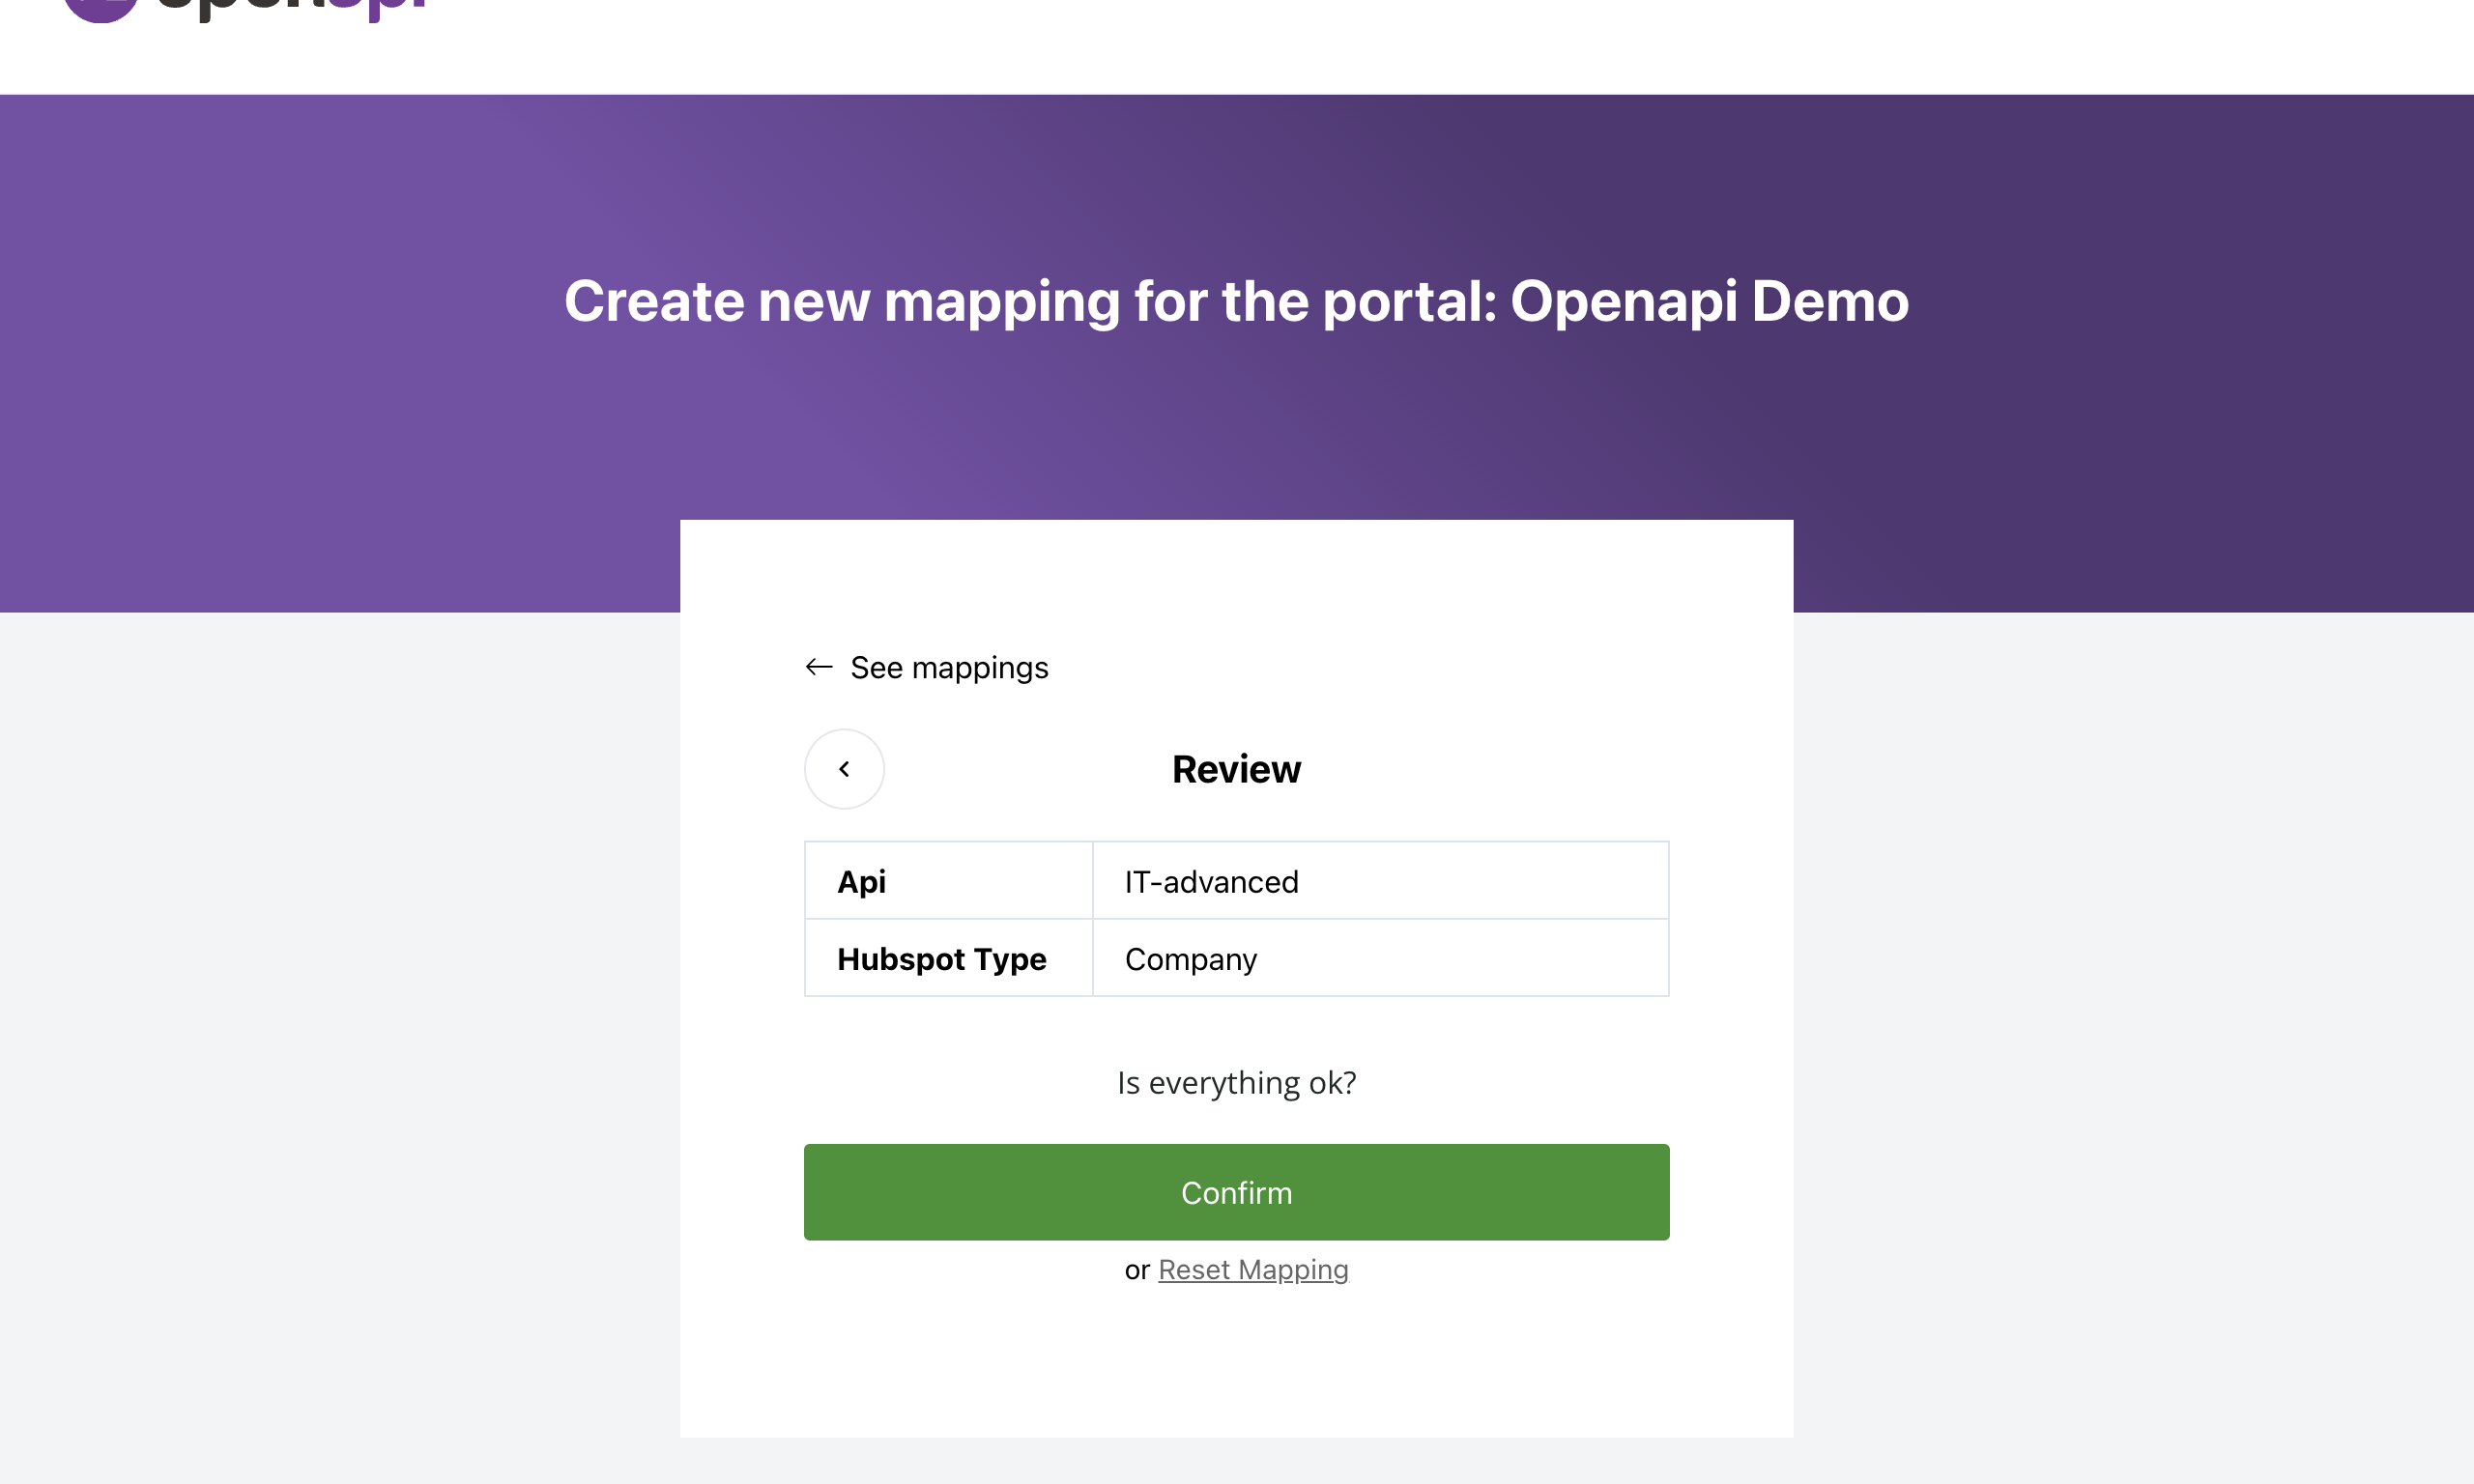
Once finished, confirm your mapping to save it.
In HubSpot, click "Workflows" in the "Automation" menu (sidebar)
Click "Create workflow", then select "From scratch"
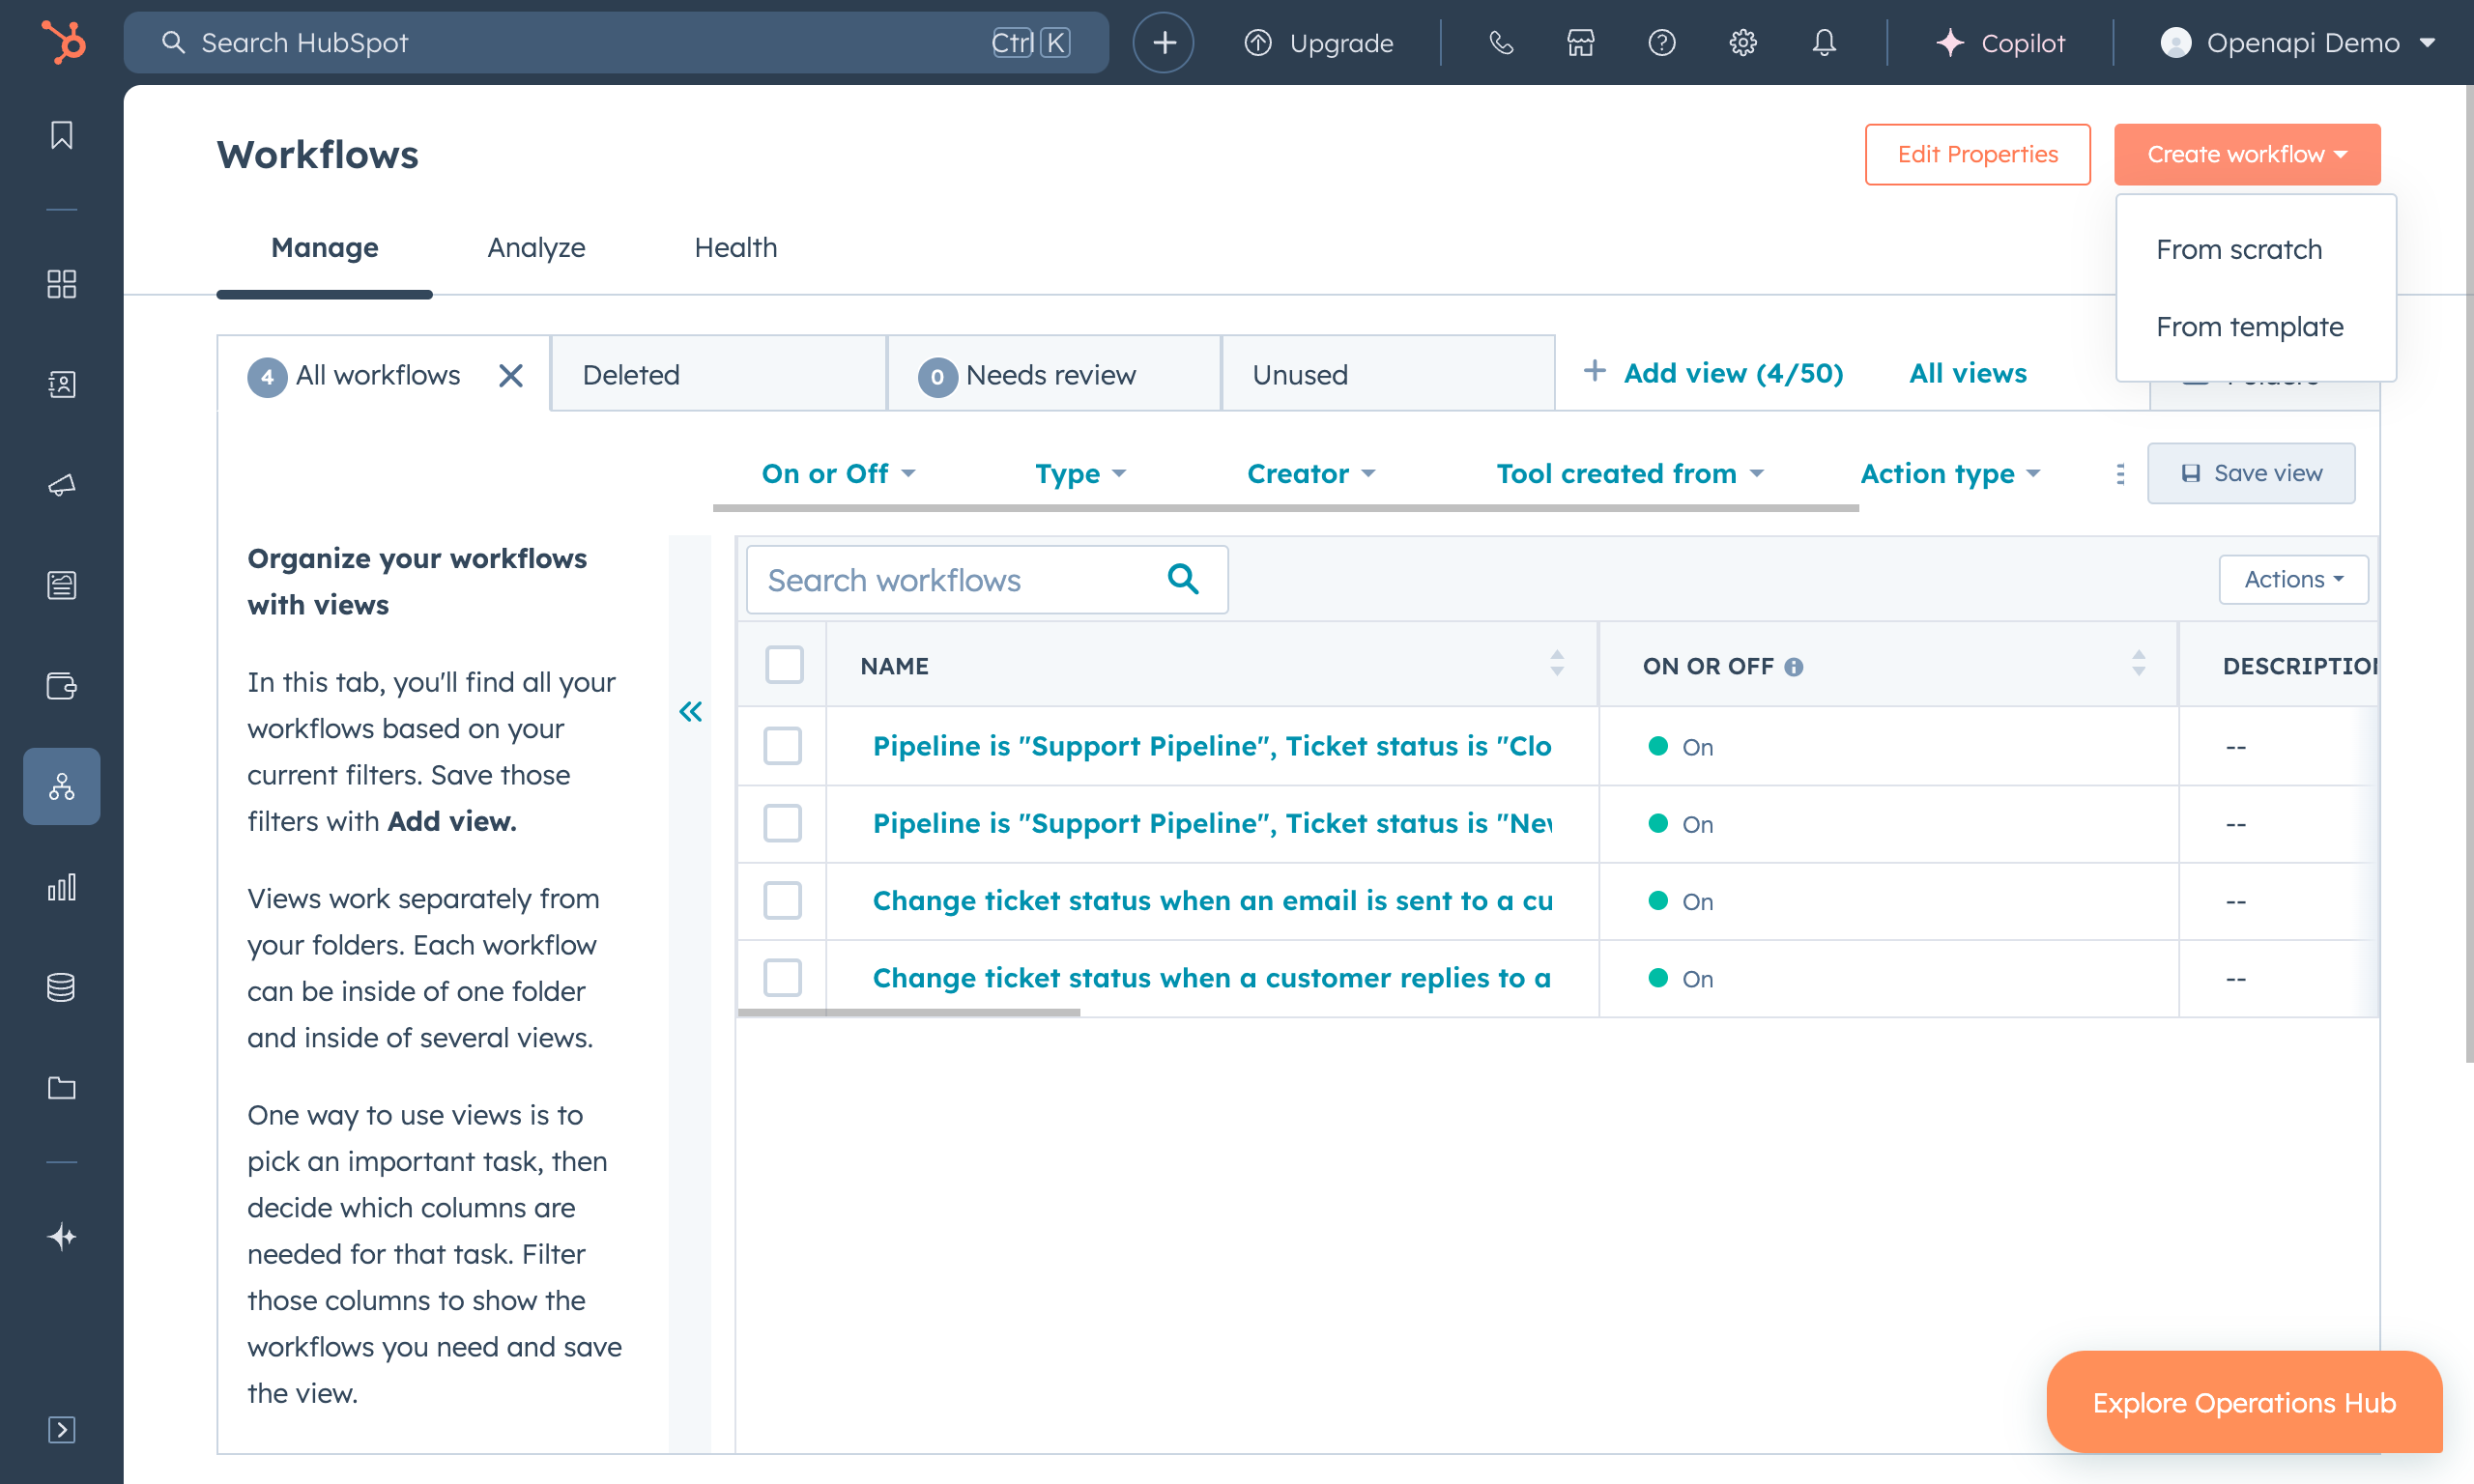
Select "Company-based", then click "Next"
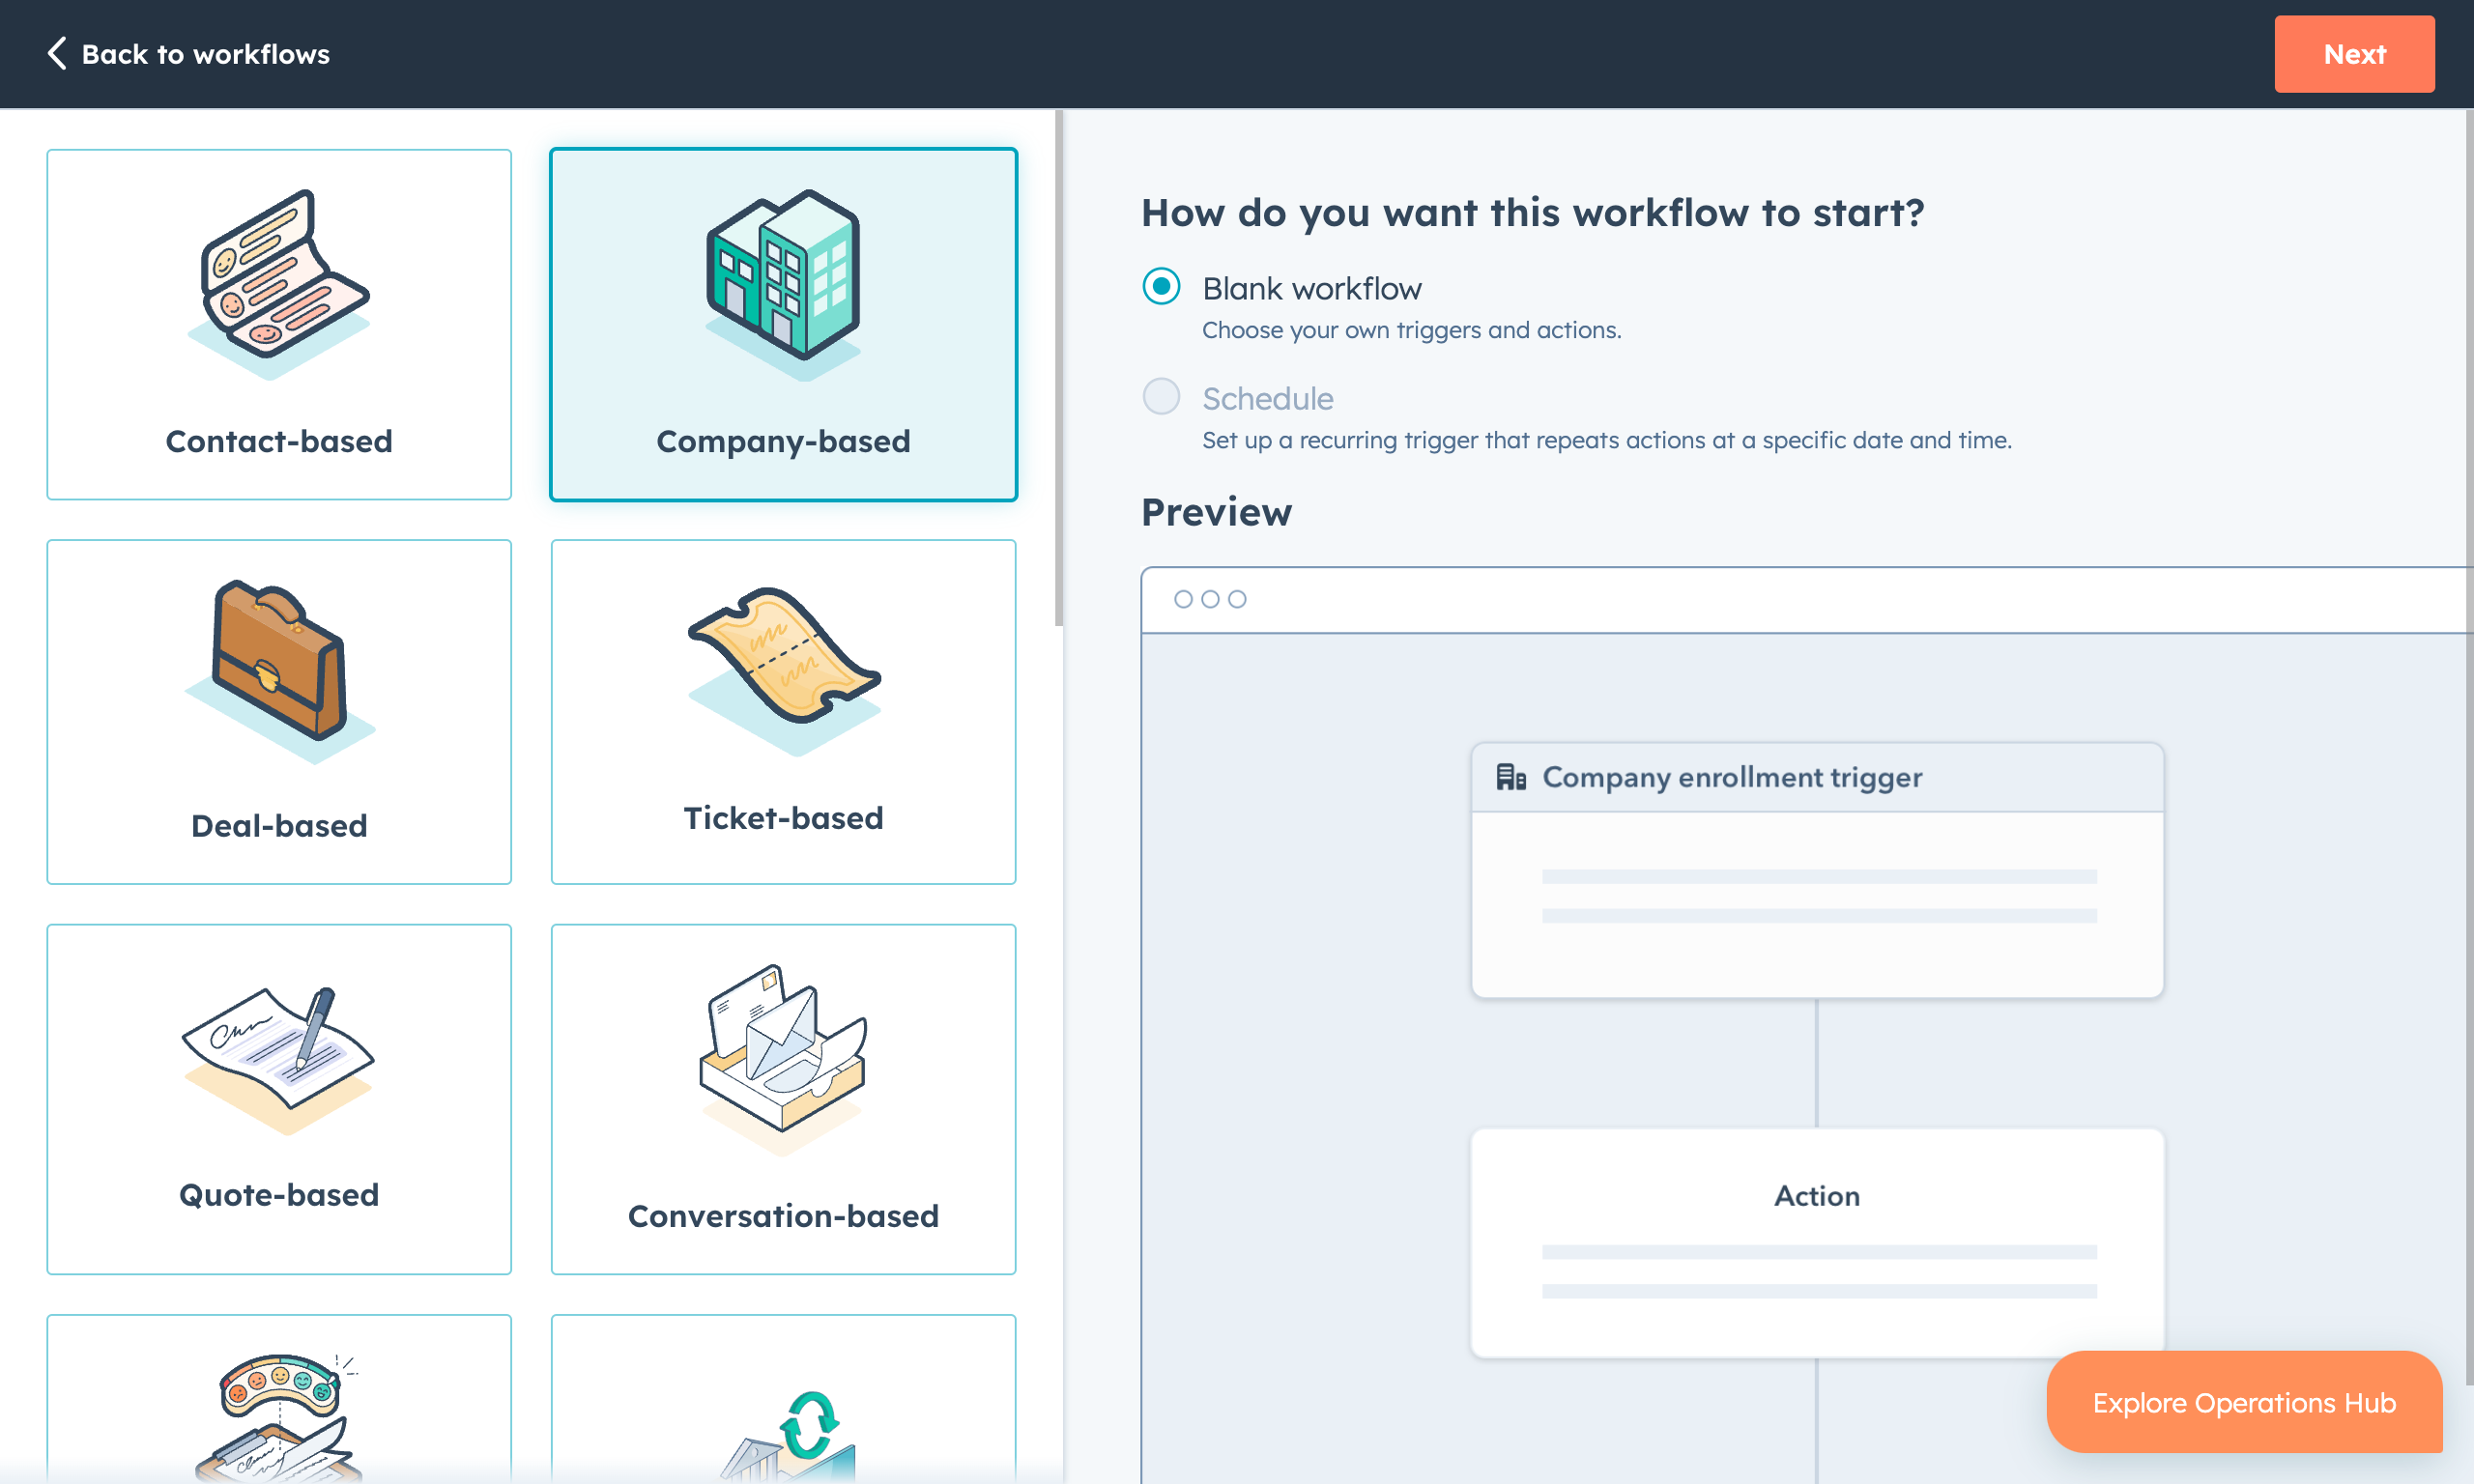
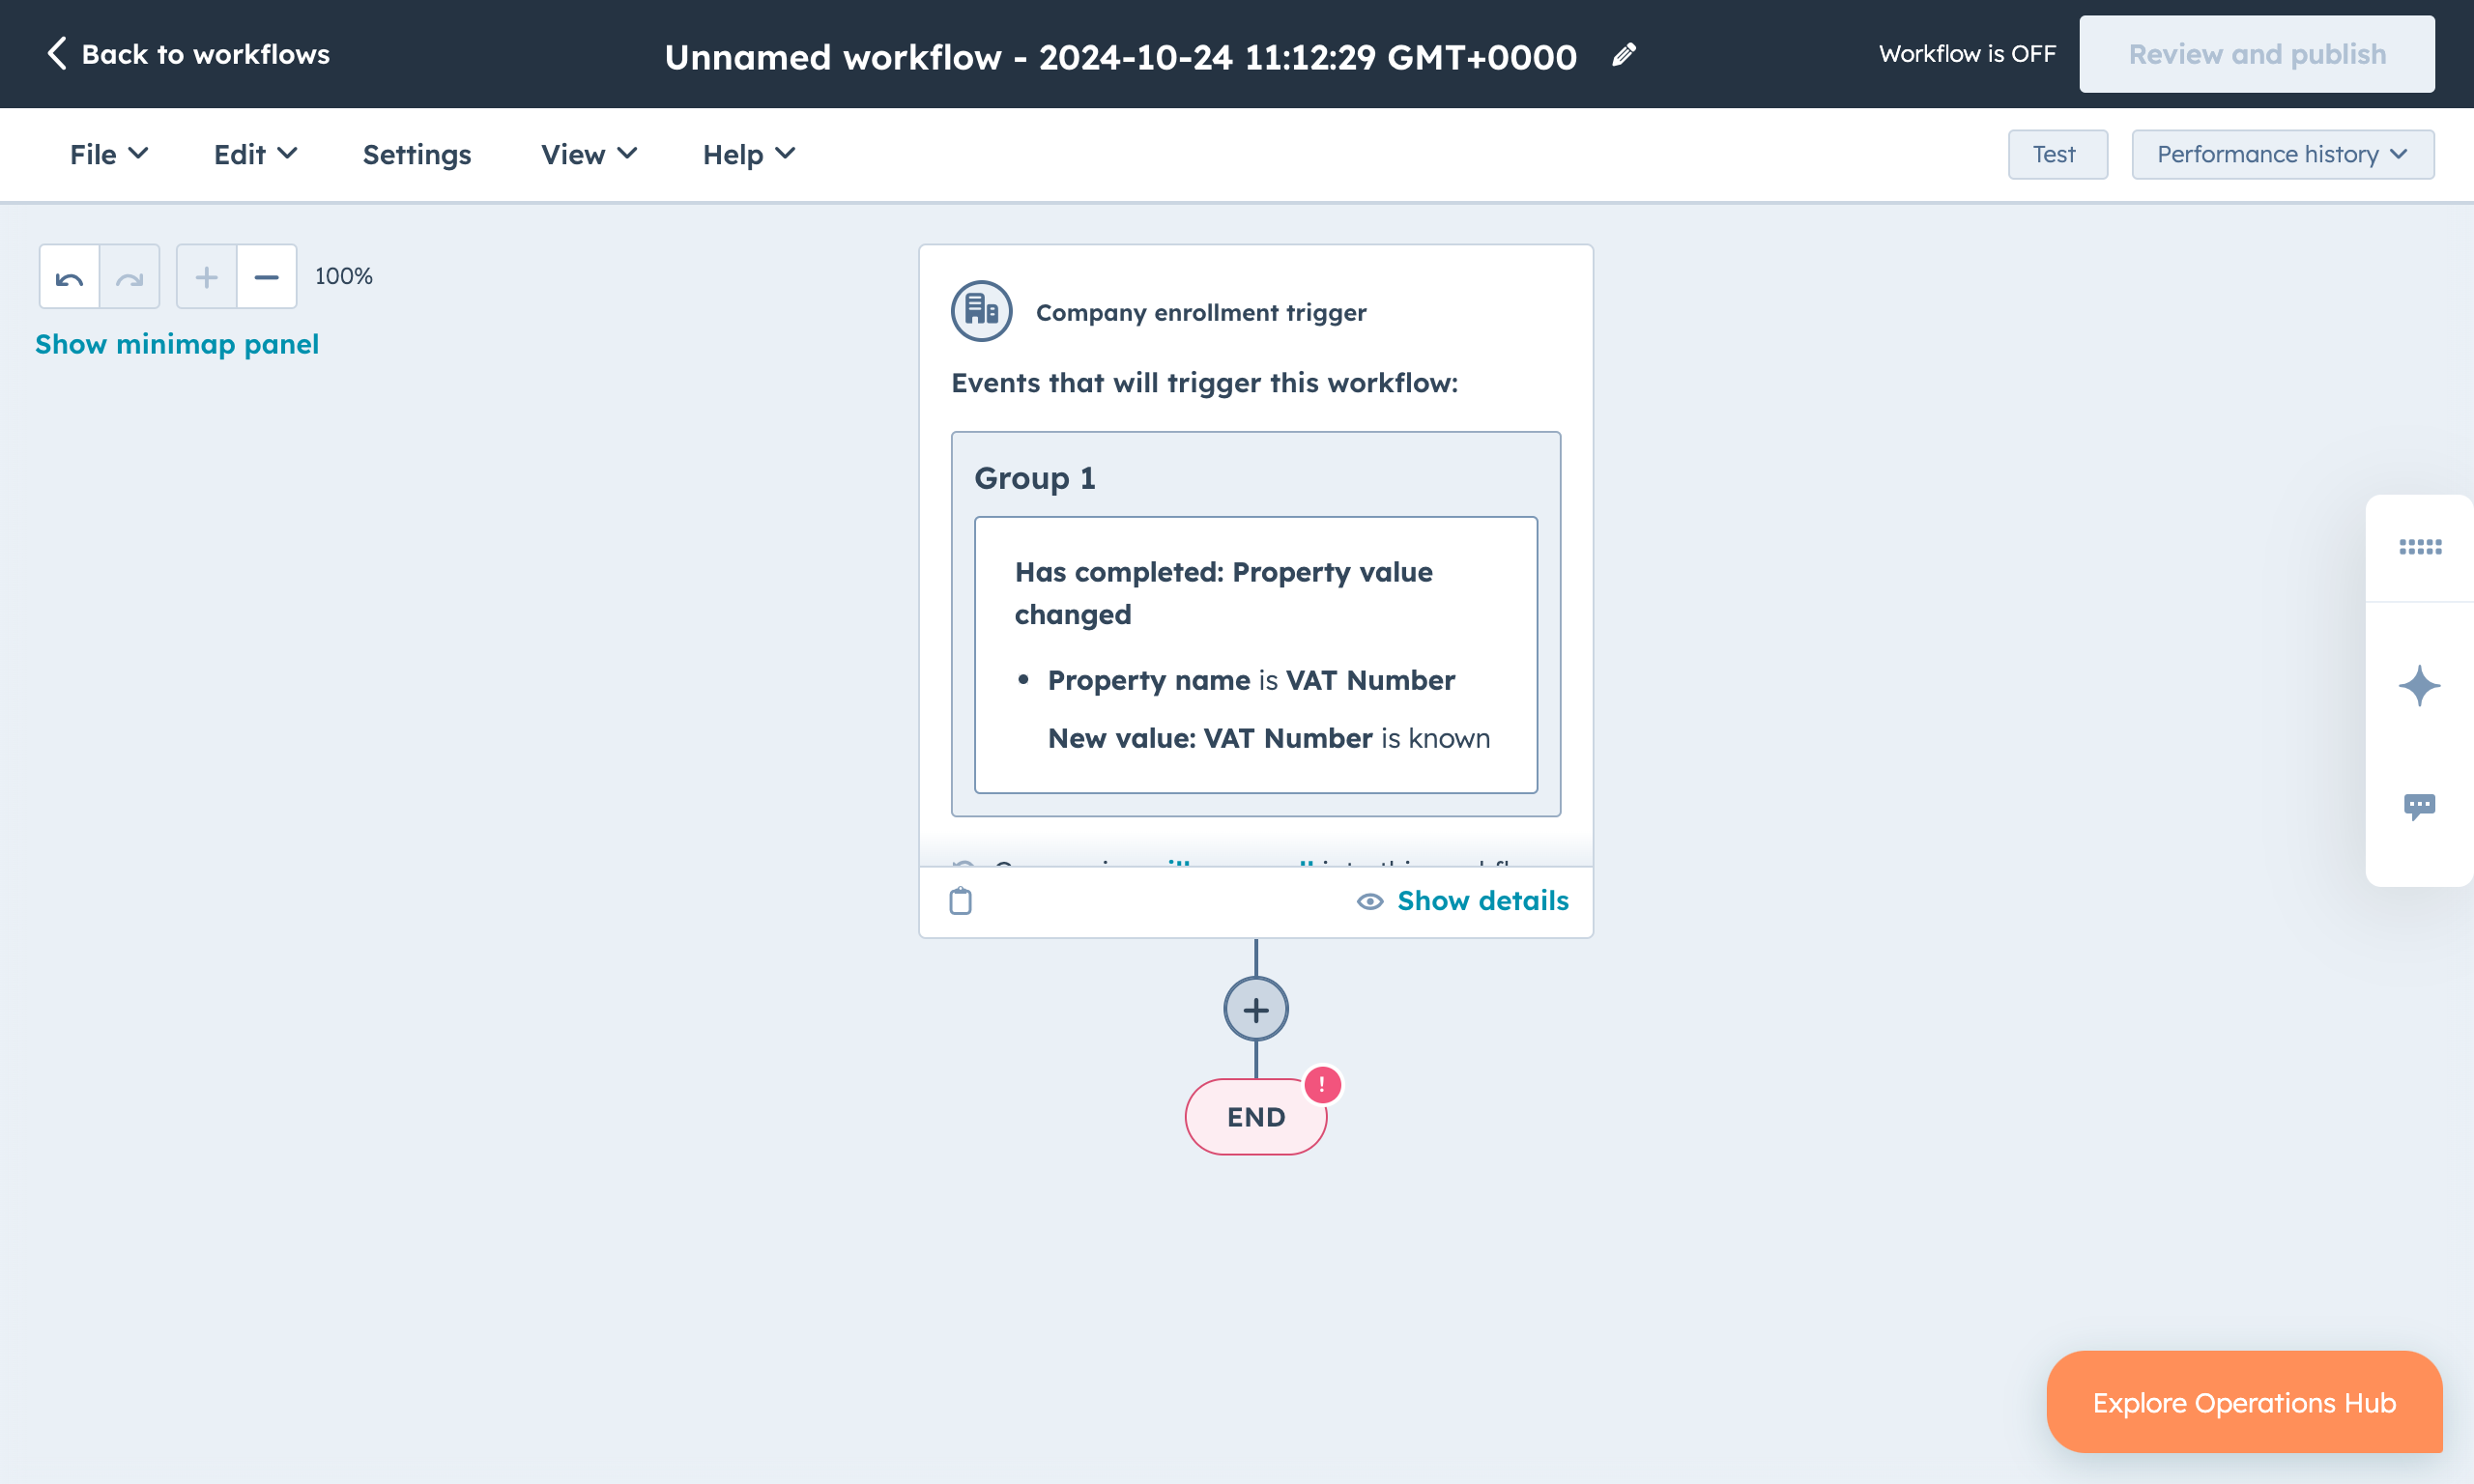
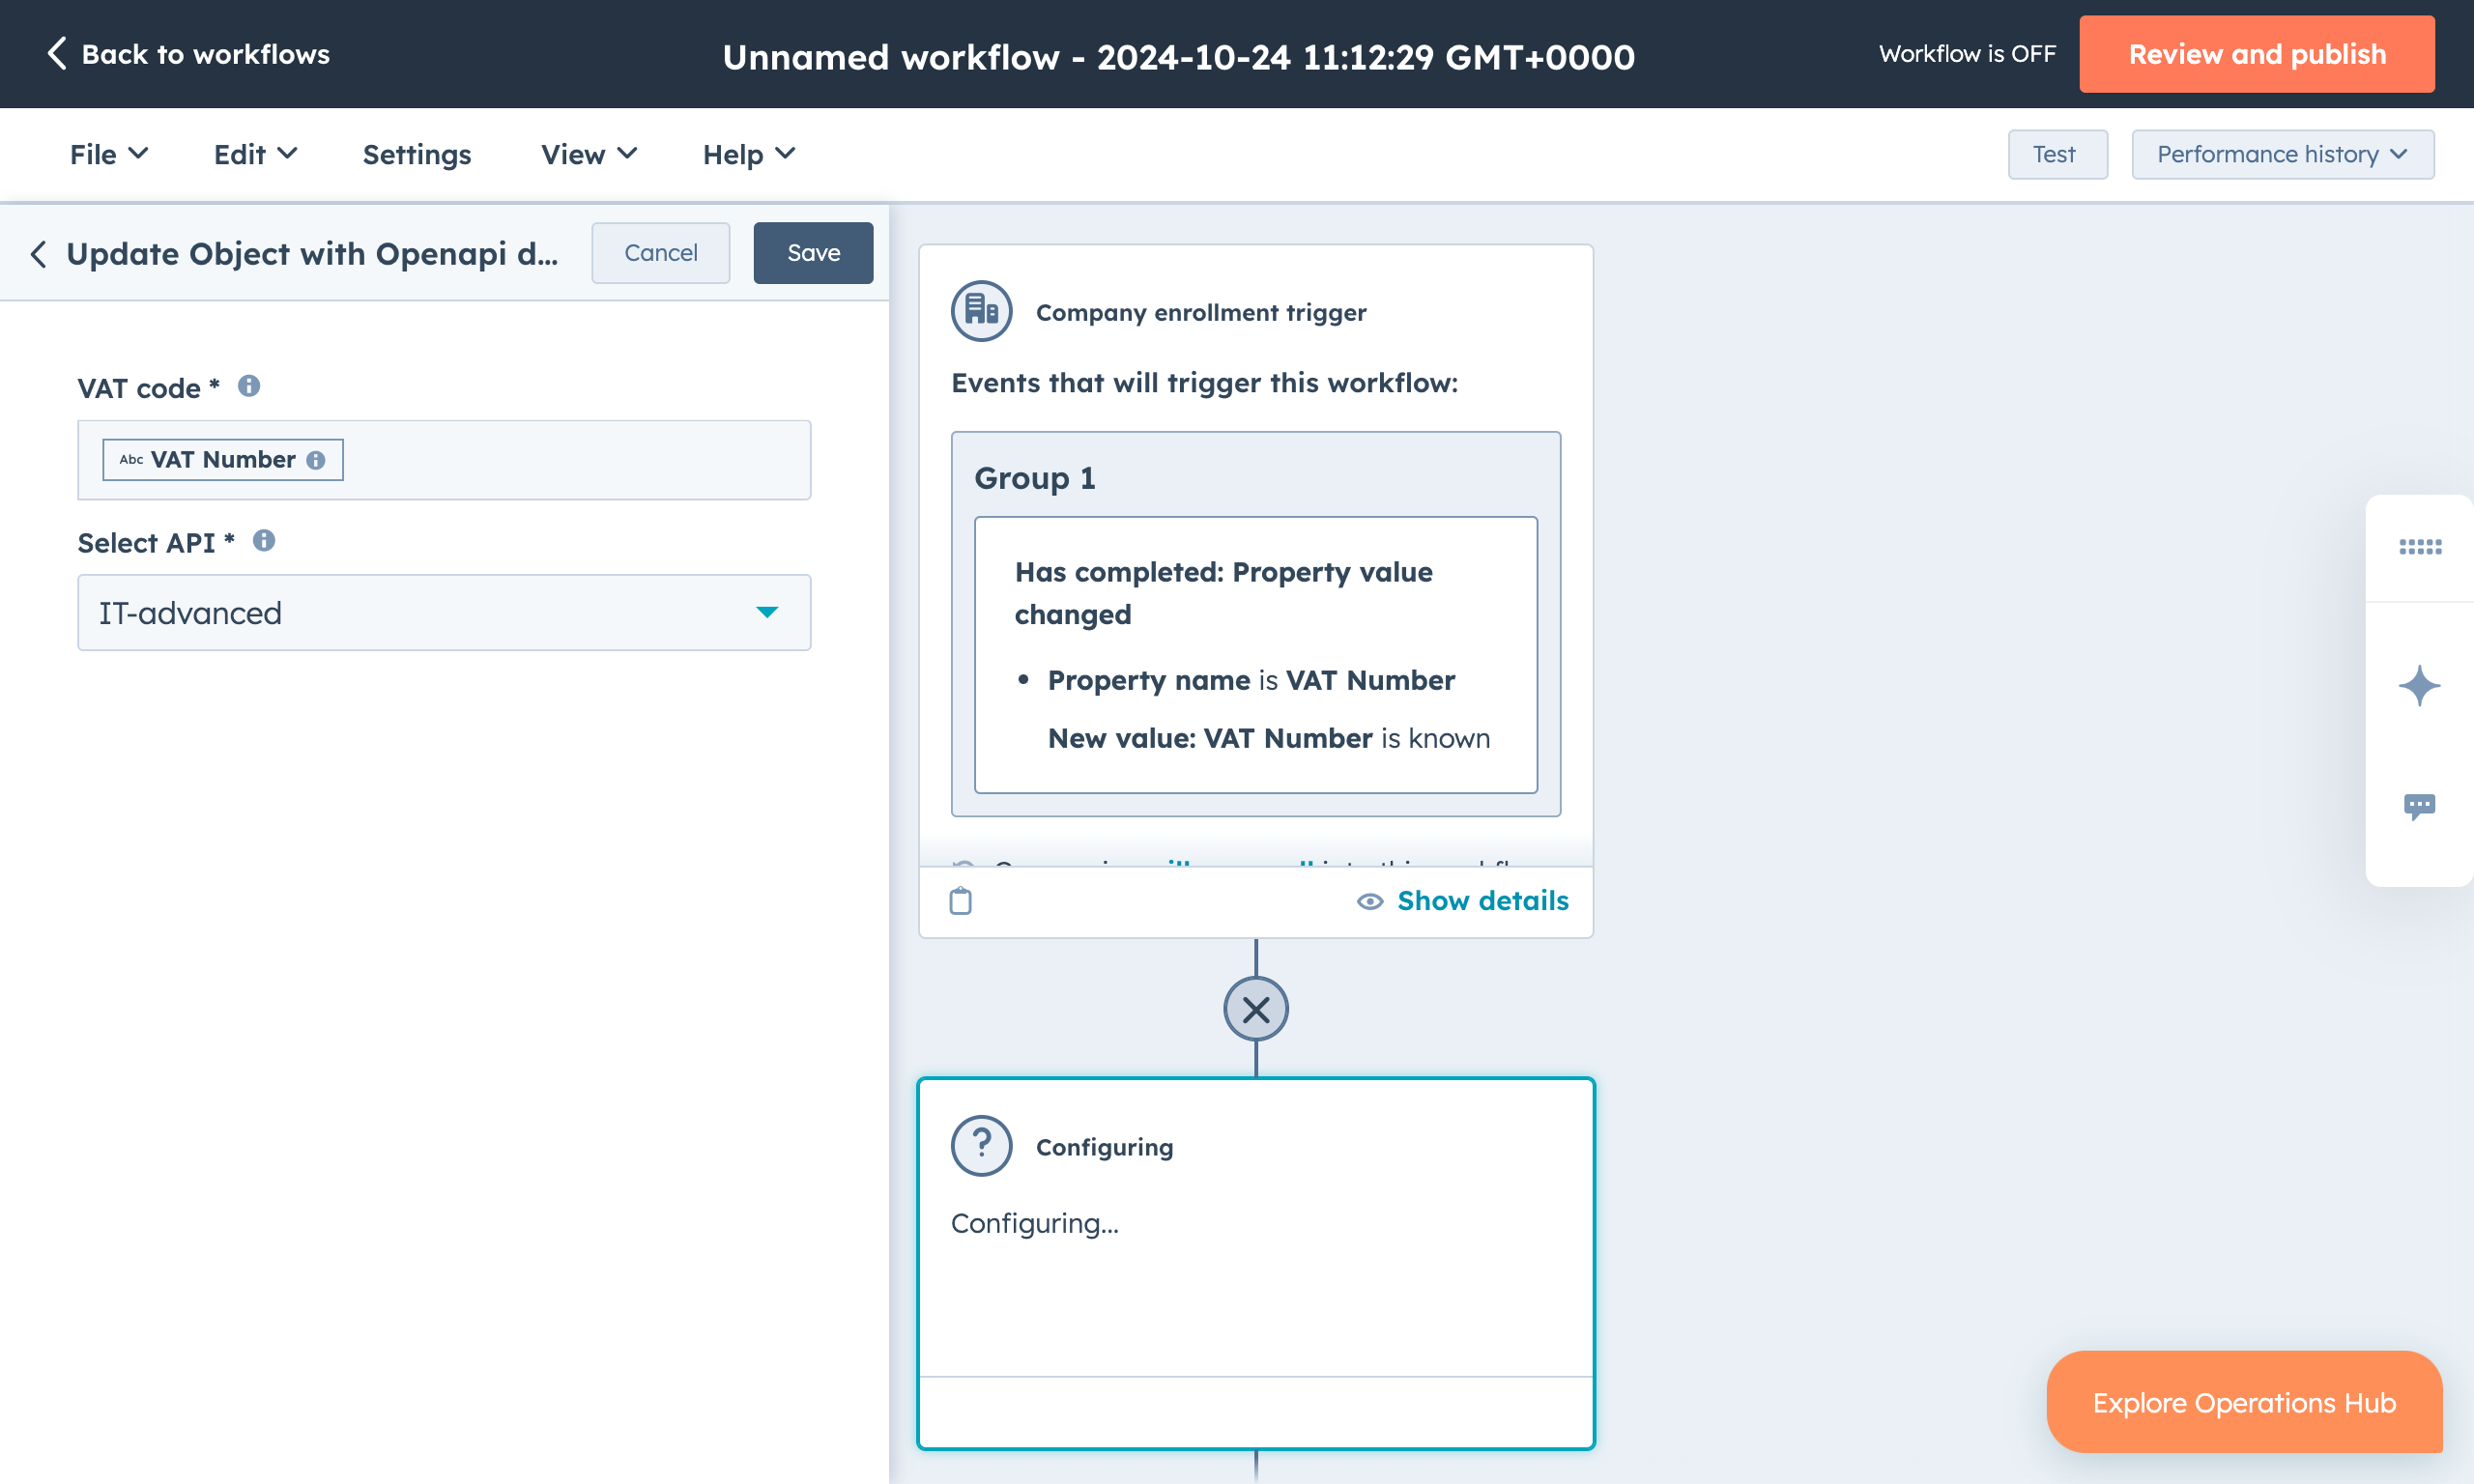
After selecting the appropriate triggers for the workflow, add a new node
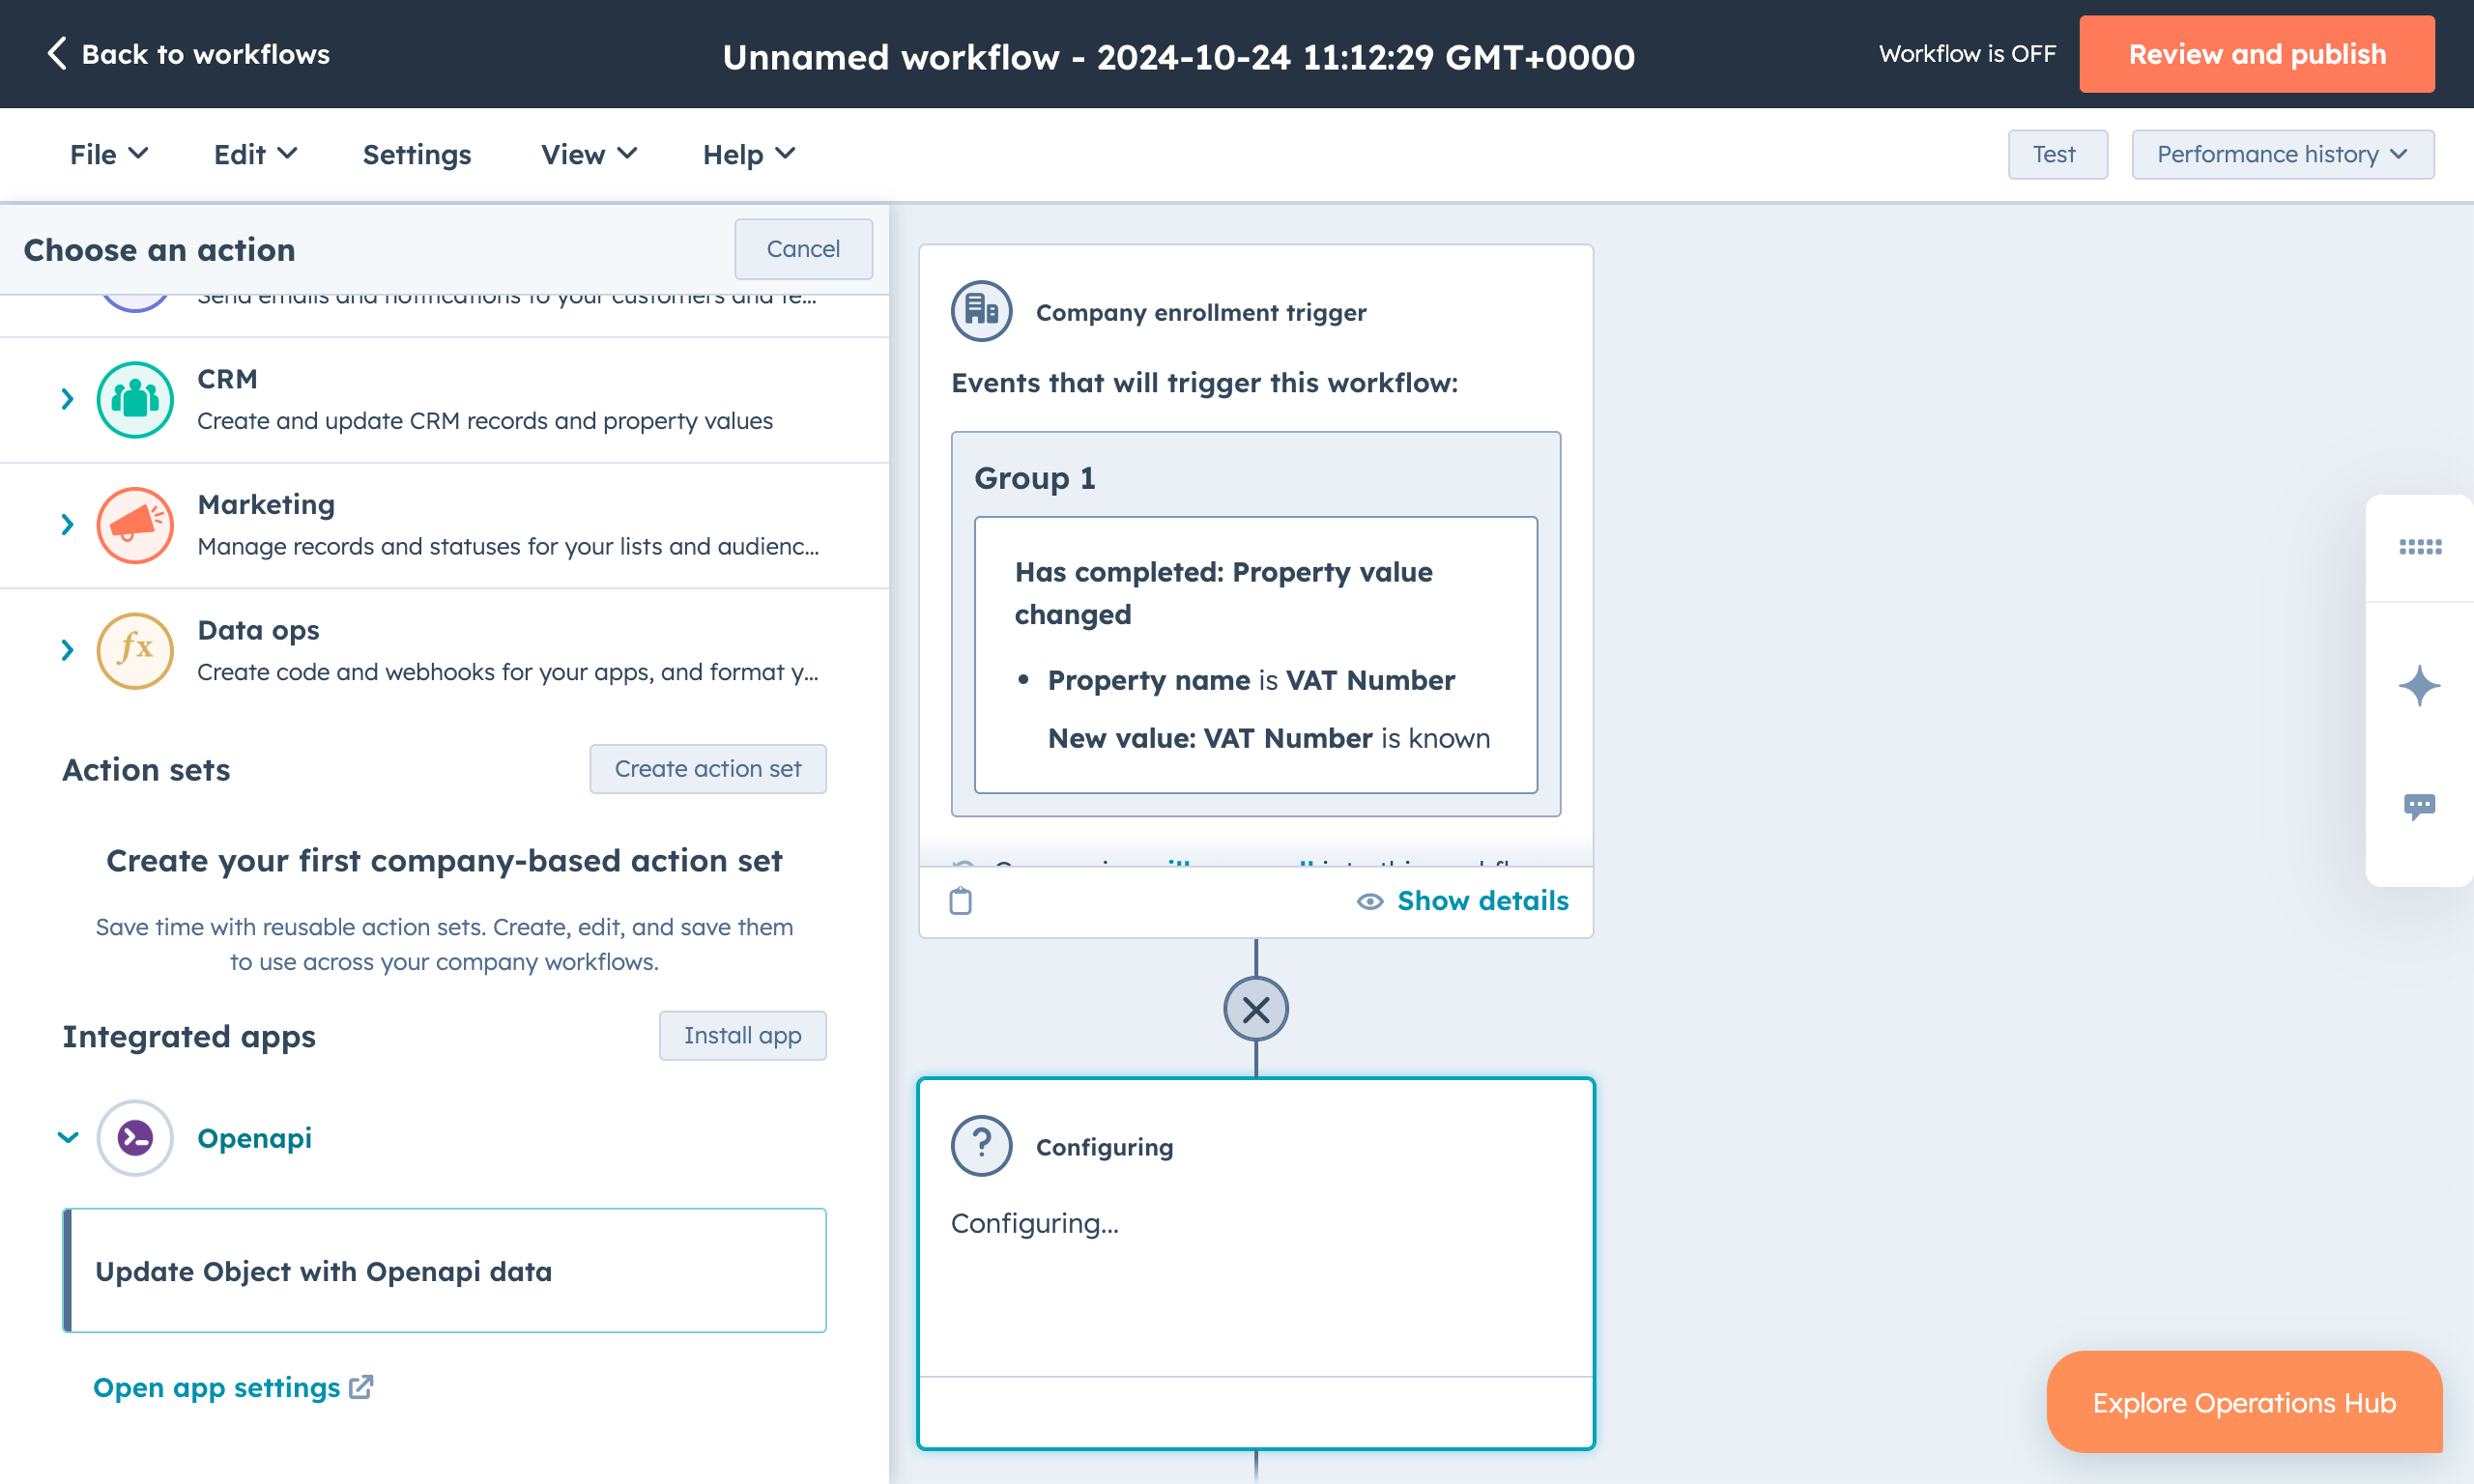
In the sidebar, scroll down until you reach the "Integrated apps" section, click on "Openapi" and select "Update Object with Openapi data"
It's time to configure your Openapi enrichment!
Click the "VAT code" field, then select the HubSpot field which contains the VAT number of the company.
For localized APIs, the VAT code doesn't need to contain the Country code. For wider range APIs (e.g. "EU base"), the country code is mandatory in front of every VAT code (e.g. "IT12485671007")
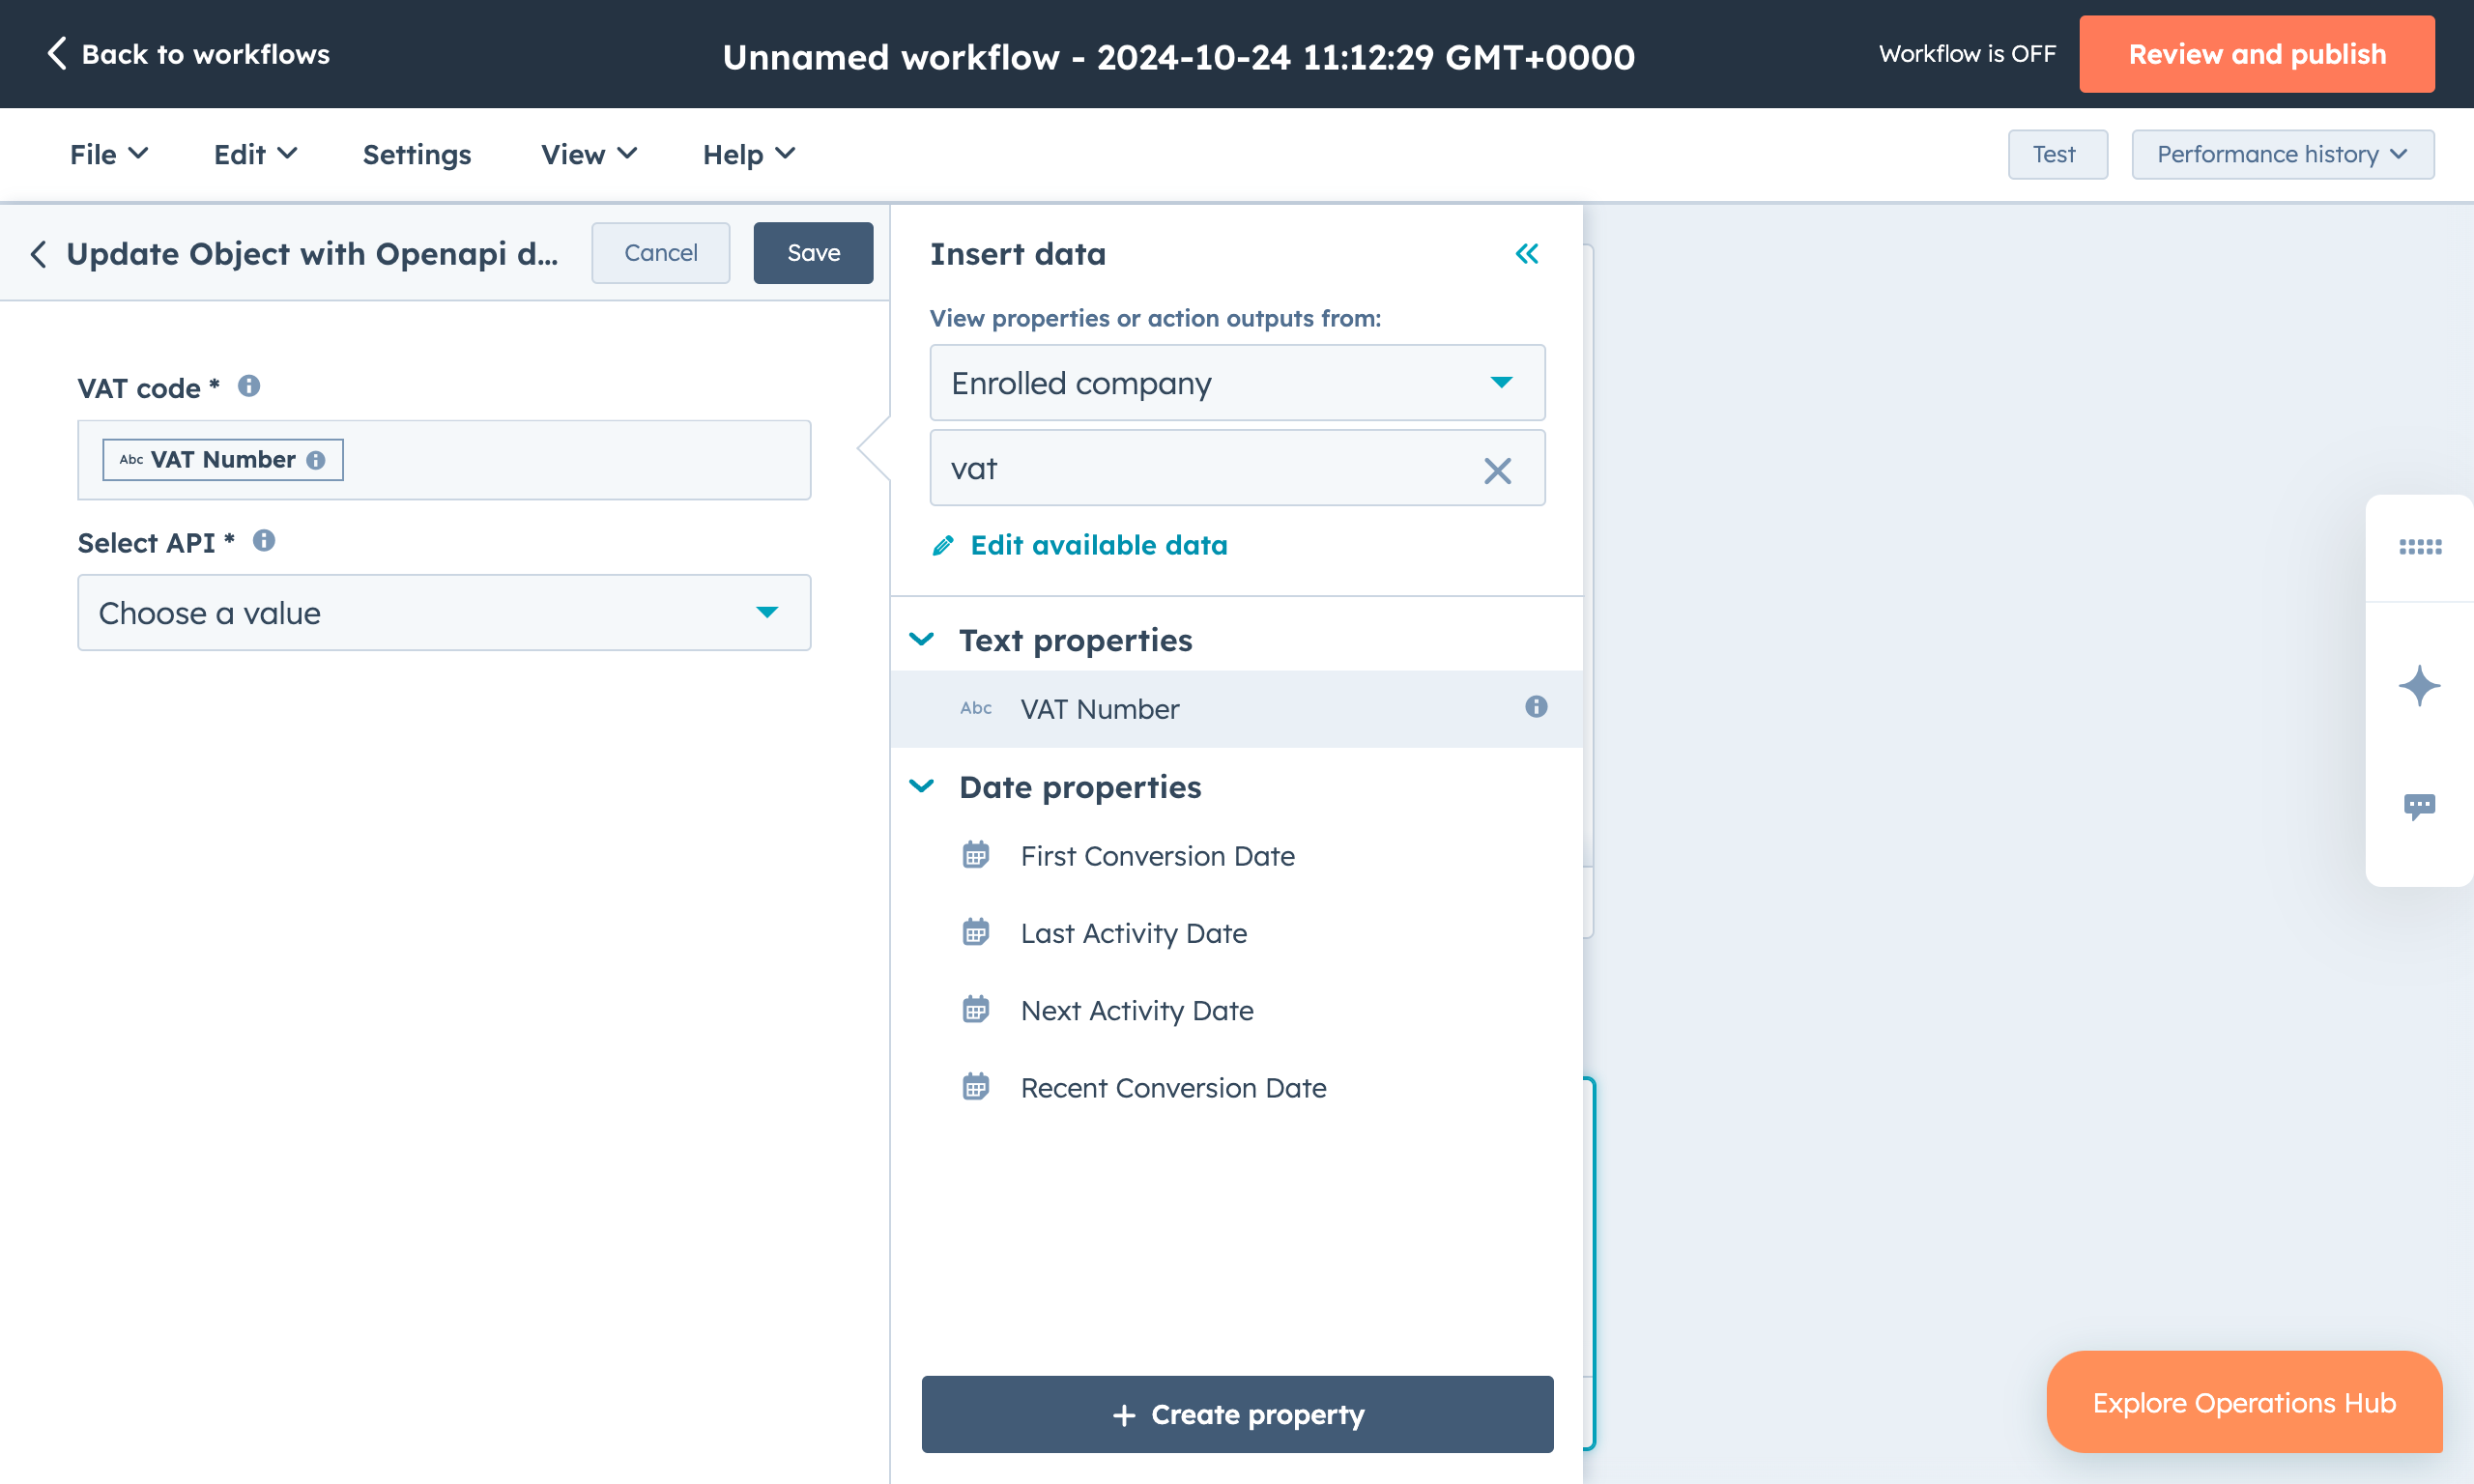
Click on "Select API" and select the API you want to use
Only mapped APIs for the specific HubSpot object will be available. If you don't see an API, be sure you created and saved a non-empty mapping for that API-Object pair.
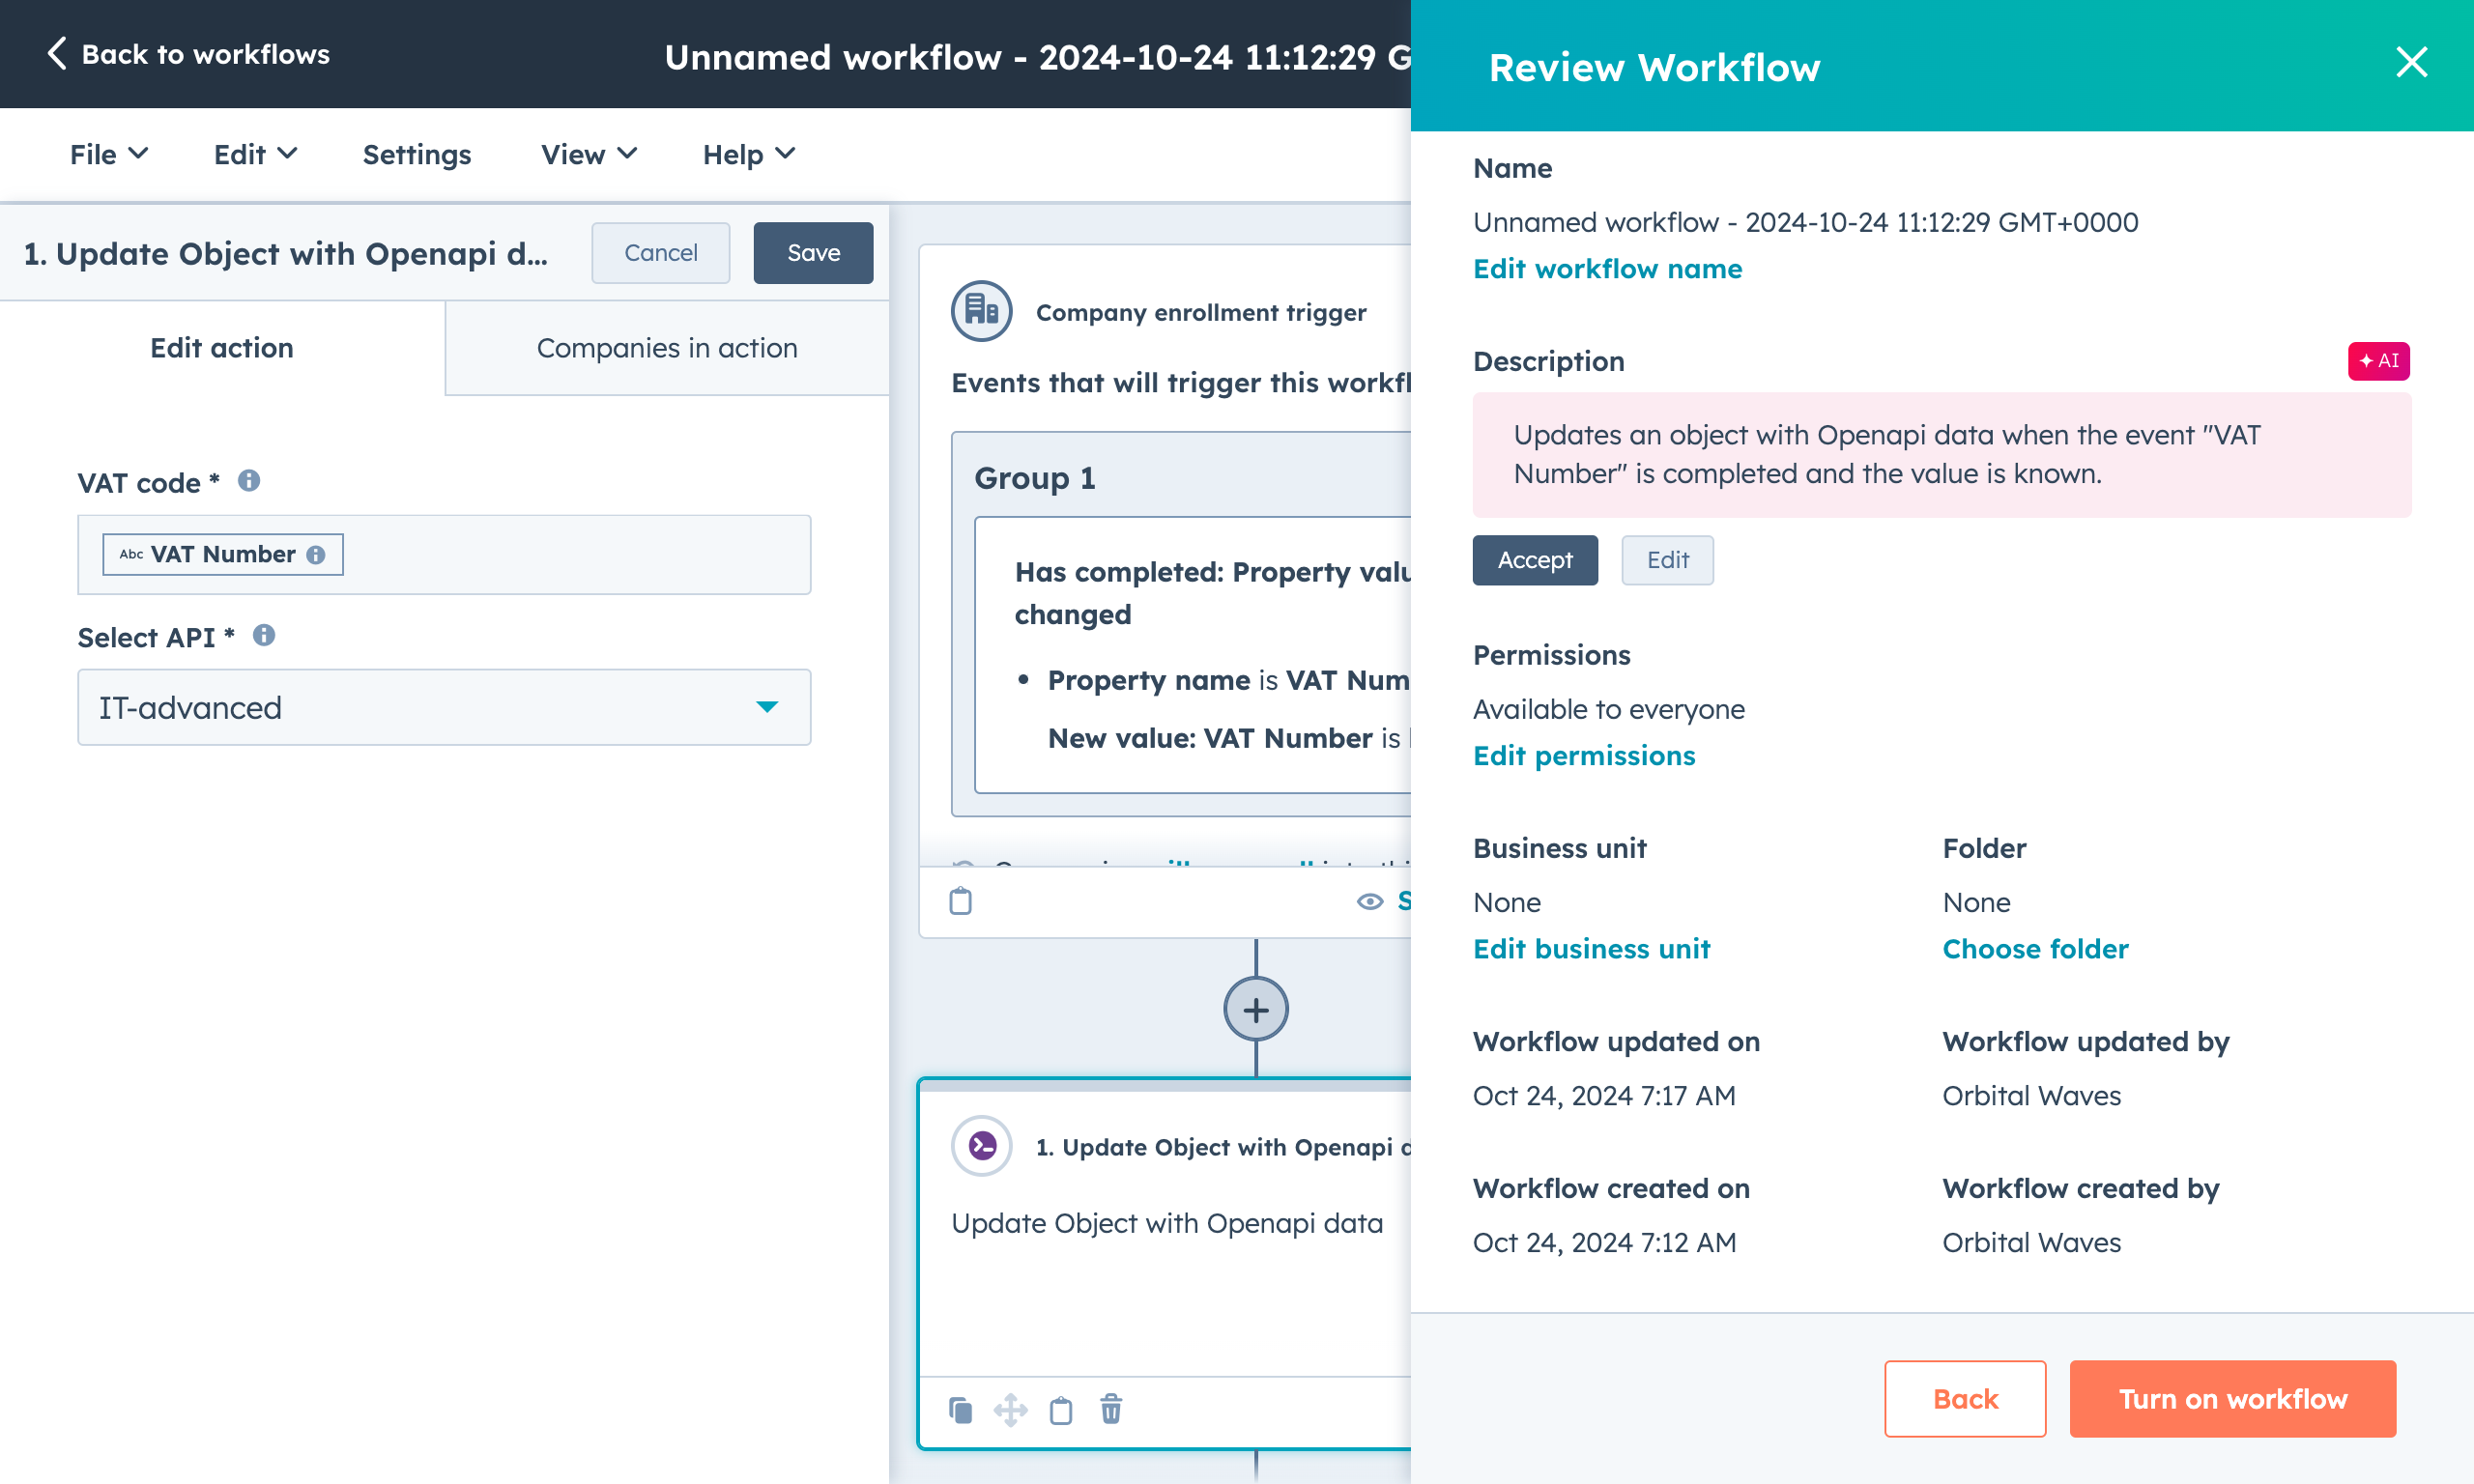
Click "Save"
Review and activate the workflow
Congratulations, you're all set!